Yet another post that centers on Royal icing transfers, yet another post following the one and only Haniela. You can watch her detailed instructions for free on her youtube channel (click here). And speaking of Haniela live, guess who will be there TODAY? I WILL! A little live about making macarons, so if you like to watch it, follow this link at noon, central time. It will be forever on youtube after, so you can save the link and watch it whenever you want….
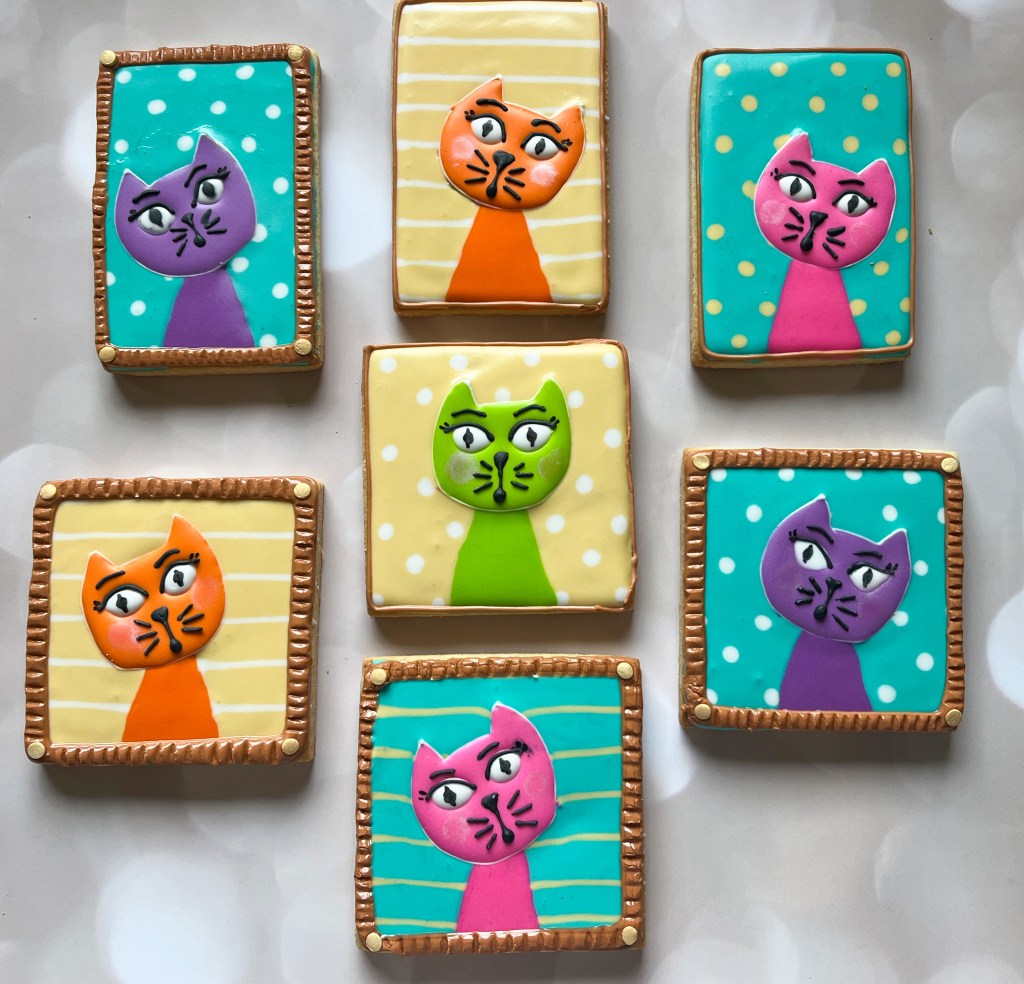
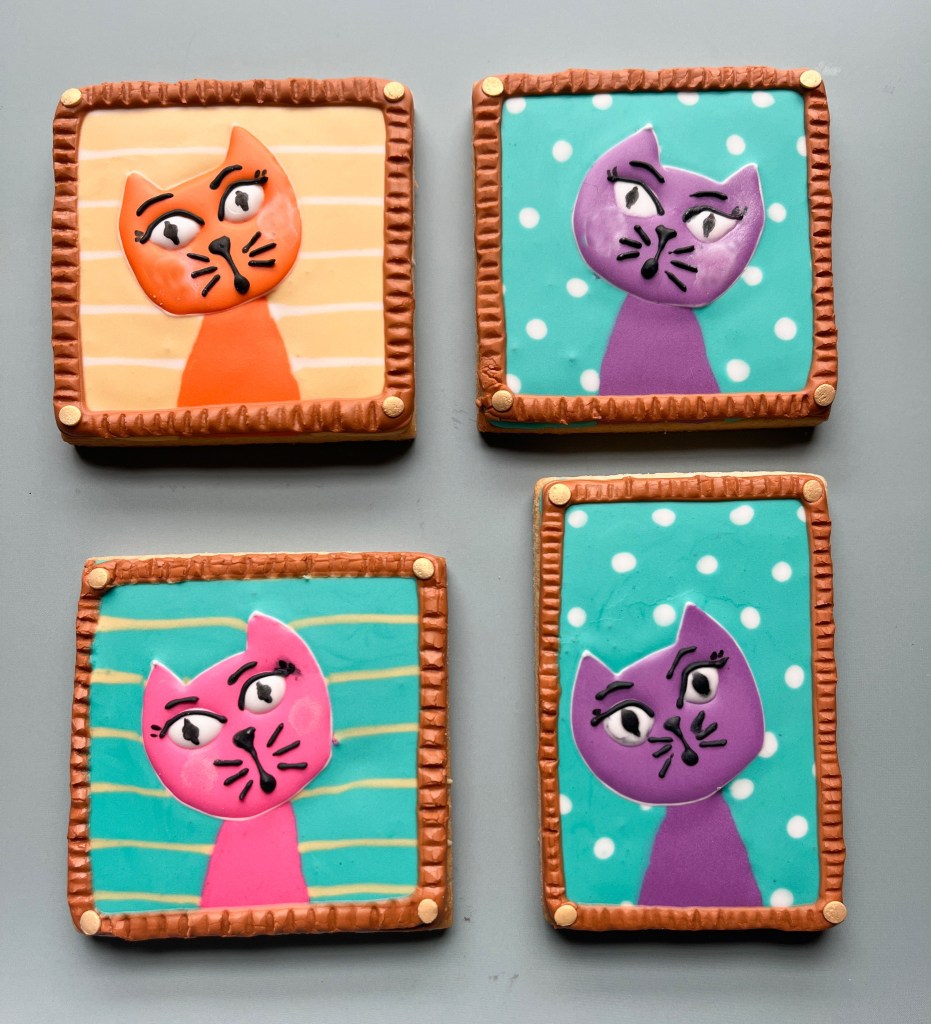
But, back to cookies… Aren’t those the cutest little things in cookie shape? My advice is do not be afraid of color, I used the Electric color set of Americolor for all tones except the gold background which was a simple, light Gold, also from Americolor. First things first, you need to get the Royal icing transfers ready at least one day before decorating. Below, some steps of the process. Haniela provided a perfect template to pipe the transfers.
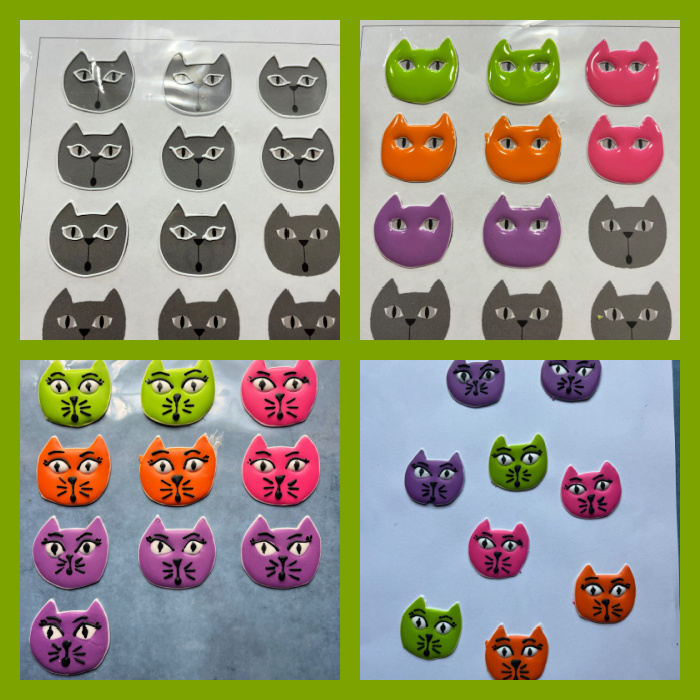
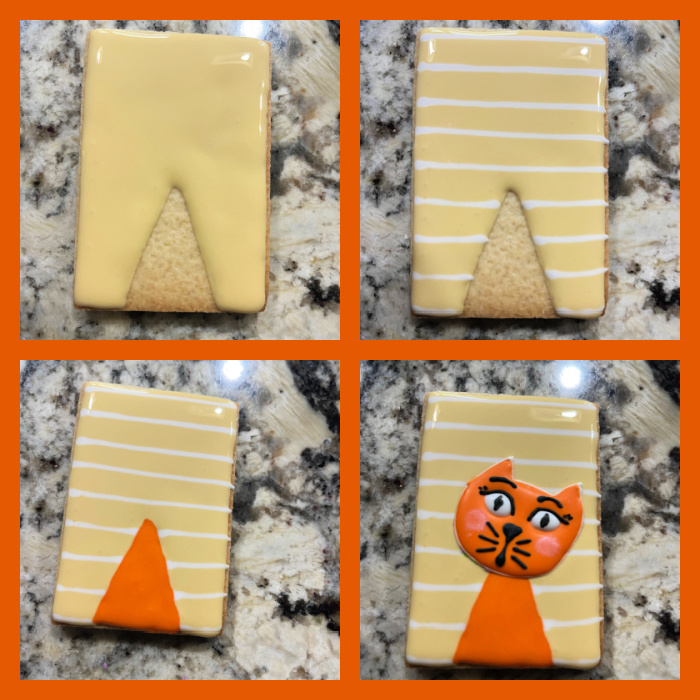
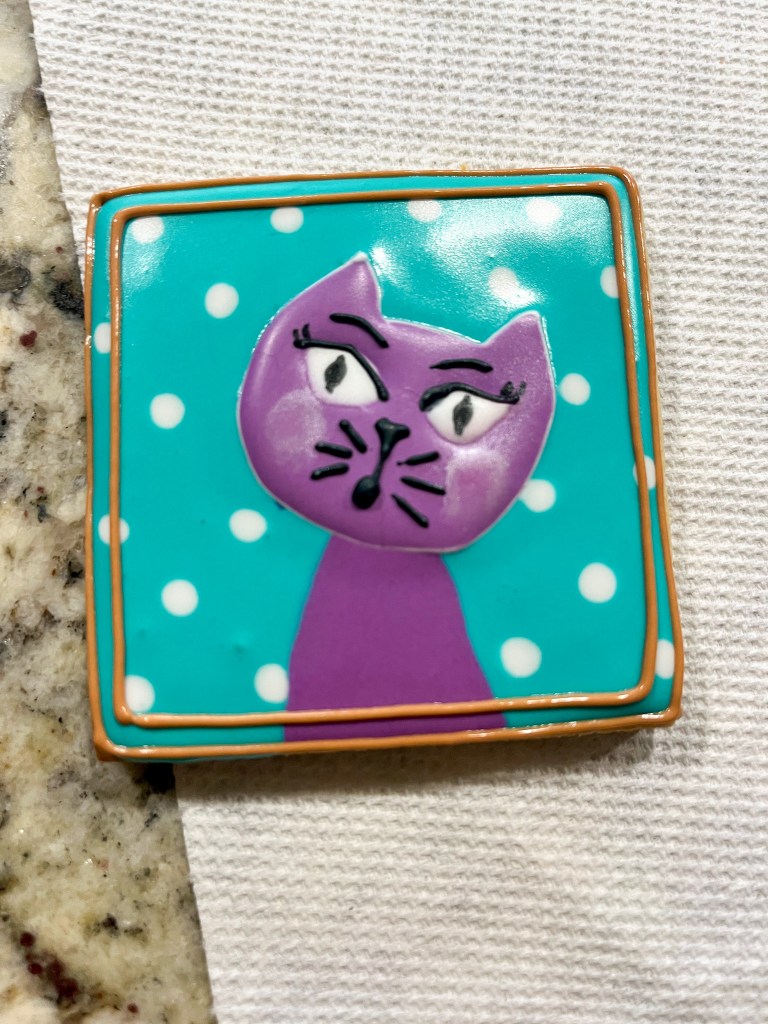
You can add the black details on the cat’s face with a pen or with Royal icing in piping consistency. I decided to face the challenge and pipe it. It is good practice… Once the transfers are fully set, you can work on the cookies. First flood the background, choosing the type of pattern and color you want.
.
Once that is all set, work on the frame, and you are DONE!
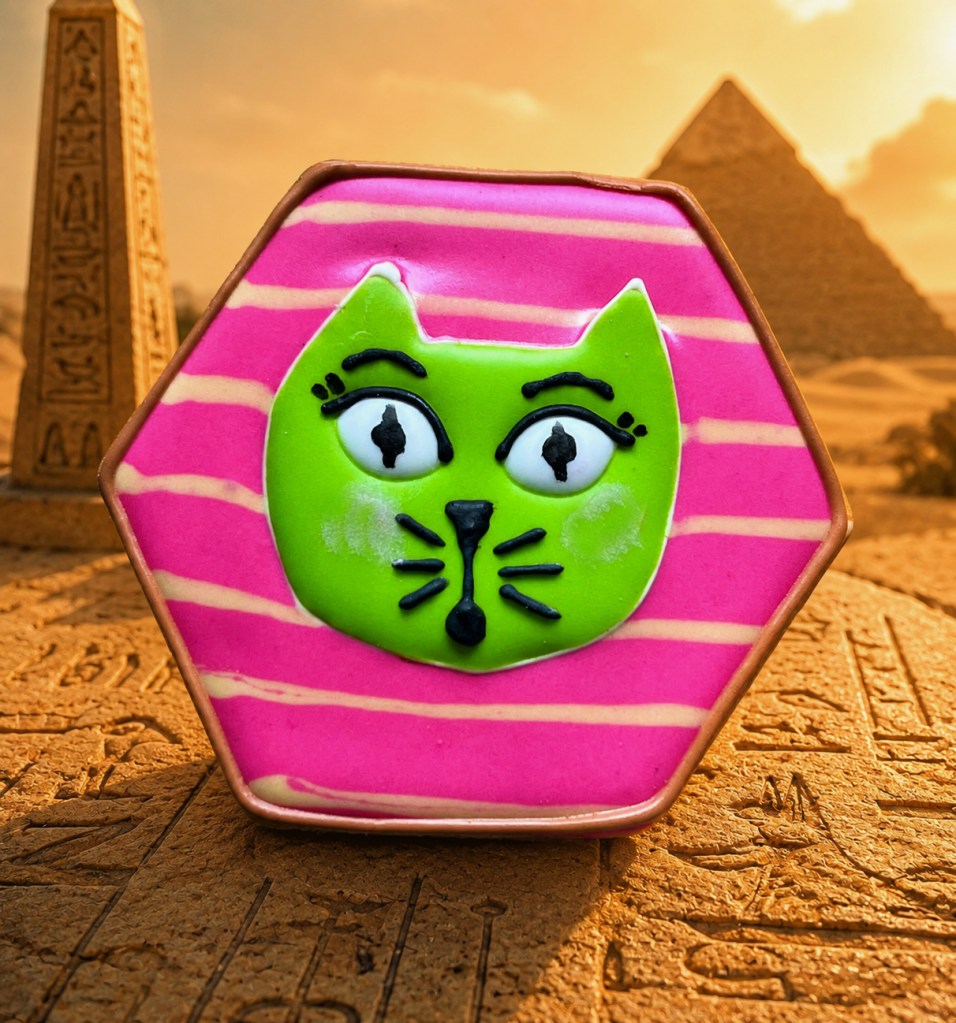
I improvised one extra shape I had hanging around and all I can see is the lid of a sarcophagus, or as my friend Margie said “looks like a cat who just discovered he is to be mummified” . Yeah, pretty much…
.
I had so much making these cookies, and hope some family with kids enjoyed the set. Gratitude to Hani for so many wonderful ideas…
ONE YEAR AGO: For the Love of Strawberries
TWO YEARS AGO: To be or not to be a Strawberry
THREE YEARS AGO: Two Zentangle Flower Motifs
FOUR YEARS AGO: Marbled Icing
FIVE YEARS AGO: Sugar Cookies, Black and White Series


Leave a comment