Just in time for Halloween, Marlyn shared a tutorial to make Frankenstein’s little creature. Let’s call him Frankie and see how he came to life. Not in our lab, mind you. In the comfort of our own kitchen.

Once again, I was not sure I could go through this little marathon of cookie decorating, but it seemed like too much fun to pass. Through her Patreon site, Marlyn provides the stencil (svg file) to facilitate piping on the cookie, and all templates for the Royal icing transfers (nose + eyebrows and chin). Still it was a bit intimidating. I started with three large cookies but one of them had a very sad death when Sally lost her temper. Enough said. He was going to be too ugly even for Viktor Frankenstein’s standards. Obviously, I cannot go through every single detail, as this is a paid tutorial from Marlyn, but the composite picture gives you an idea of what is involved: making the transfers, piping each section (including the eyes), and assembling everything. The screws are molded fondant painted with silver dust.

One of the things I need to be more attentive to, is making enough icing so that I don’t run out of the color and have to make more midway in the design. Especially when making large cookies, I tend to underestimate amounts. As a result, my poor monsters have two different shades of green, plus the green used for the transfers. Not a huge problem, but definitely something to correct in future projects.
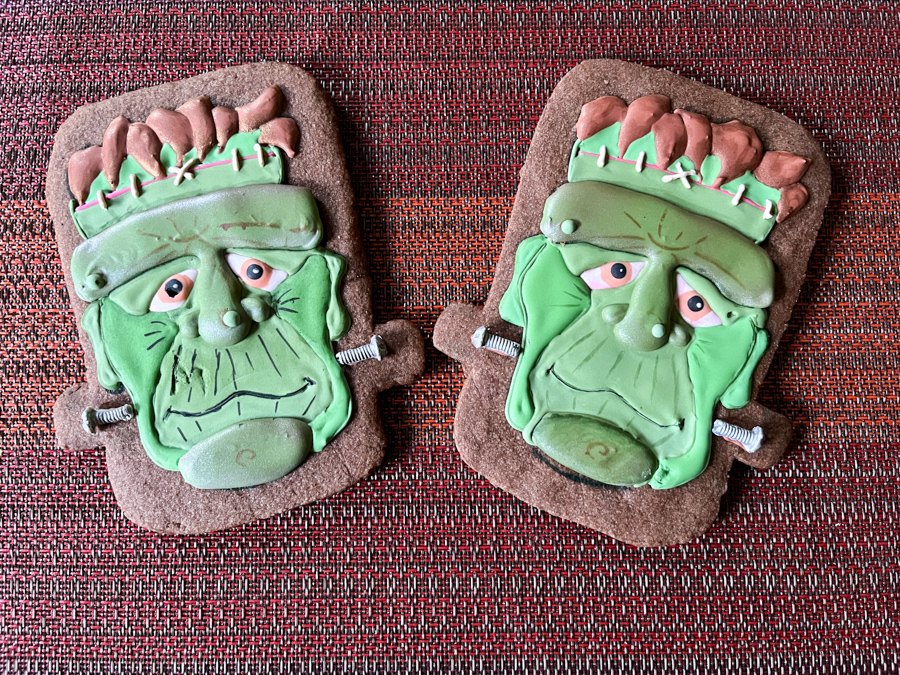
What I enjoyed the most about this was piping the eyes! Odd, because I was so scared of it, but that part did not give me any troubles. The icing on other areas had some boo-boos, but the good thing about Halloween is that the cookies don’t have to be perfect. So there you go…
ONE YEAR AGO: And now for Pumpkin Completely Different


Leave a comment