To join Amy’s Facebook group and be on top of future online classes, click here.
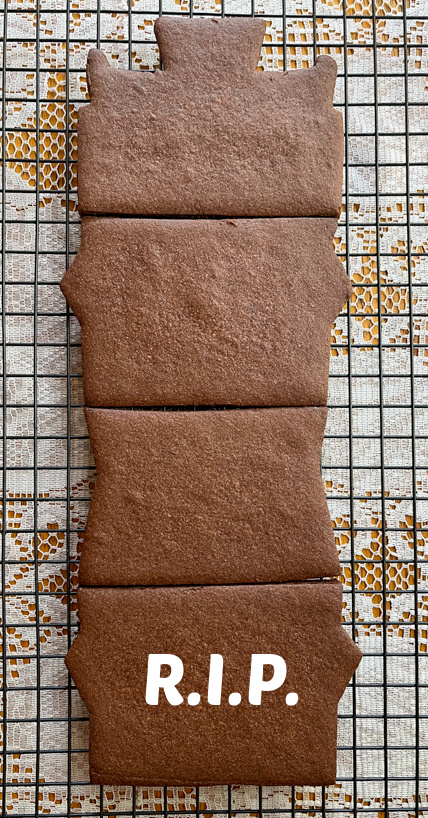
One more class under my belt, but this one I messed up a bit. The full set contains 4 cookies, but you will only see three, because… tragedy took place. What is Sally’s life without a little drama?
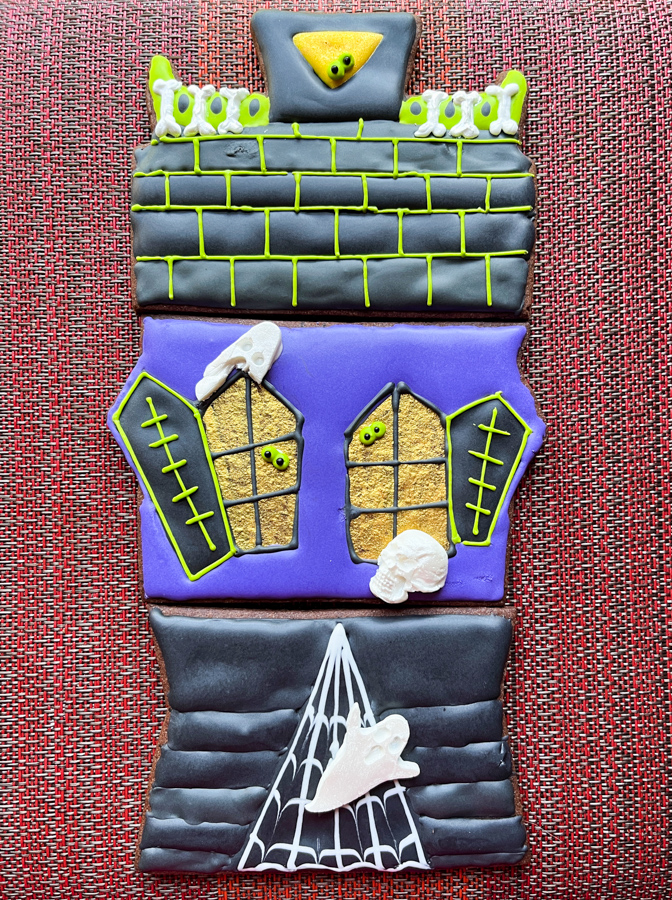
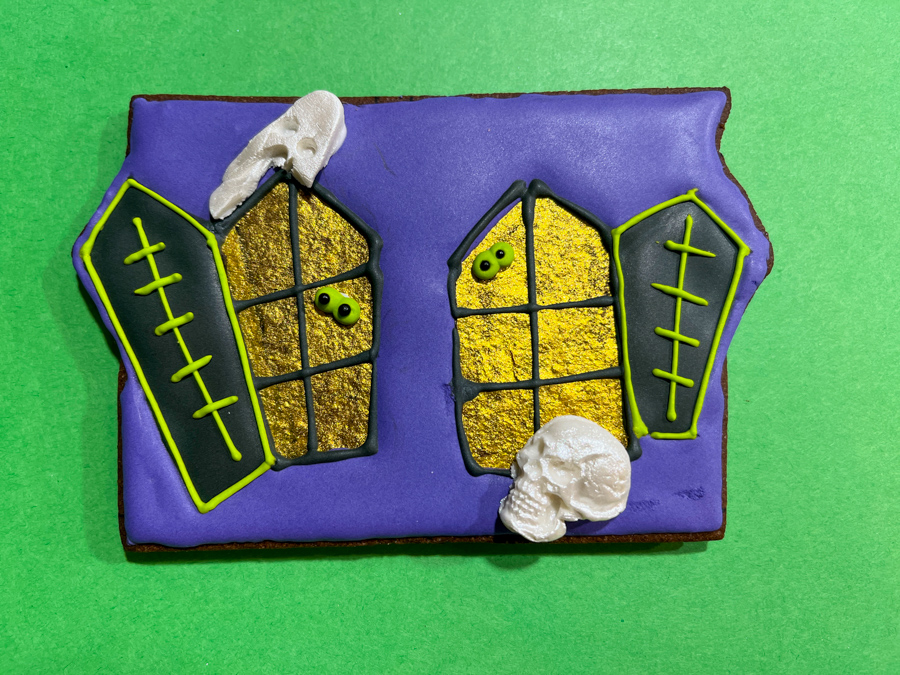
I cut the cookies by hand because instead of buying the cutters. Their shape is so unique, I did not anticipate using them again until next Halloween. If you’d like to buy them, the set can be found online (check the store clicking here). Lots of little details went into the making of this composition. Before class, we made fondant decorations and prepared all the icing. I also made a few bones as Royal icing transfers. If you have a mold for that, you can go with fondant or modeling chocolate.

In the beginning of class, we made the little green eyeballs, and with that step out of the way, we were ready for decorating action!
The bottom cookie, which had a door and two tombs, gave me a lot of trouble. I made a few mistakes, ran out of black icing in the middle of the class, had to rush to make more, and things went downhill fast. So that cookie was sacrificed to the Cookie Gods, hoping that they will be kinder on me in future projects.
They work great together as a set, but also as individual cookies, as you can see below. The one with the windows was a lot of fun to make. Amy makes us draw everything free-hand, which blows my little mind. One line at a time, she takes us there. I love it!
And of course, the spider web piped as wet-on-wet is a great technique to keep in mind for this time of the year. You can add that to all sorts of cookie shapes, place a fondant spider or a ghost on top, and you are all set! Simple, yet effective…

Amy, thanks again for yet another amazing class! I just wished I had not messed up the bottom cookie, but I know everybody else in class did a great job with that one, so trust me, not your fault!
ONE YEAR AGO: Cookie Lace Designs


Leave a comment