Of the many cookie adventures I’ve embarked in the past year, I suppose this was the most challenging. Maybe. It is a heavy competition with the Chinese New Year of the Tiger set, also designed by Marlyn. It involved cutting four different stencils, layering the different colors by air-brushing, and once all is said and done, piping fine lines all over the design. I made the cookie twice, and share two different ways to do it. The second version a little easier because you will be using a food safe pen to make the outline.
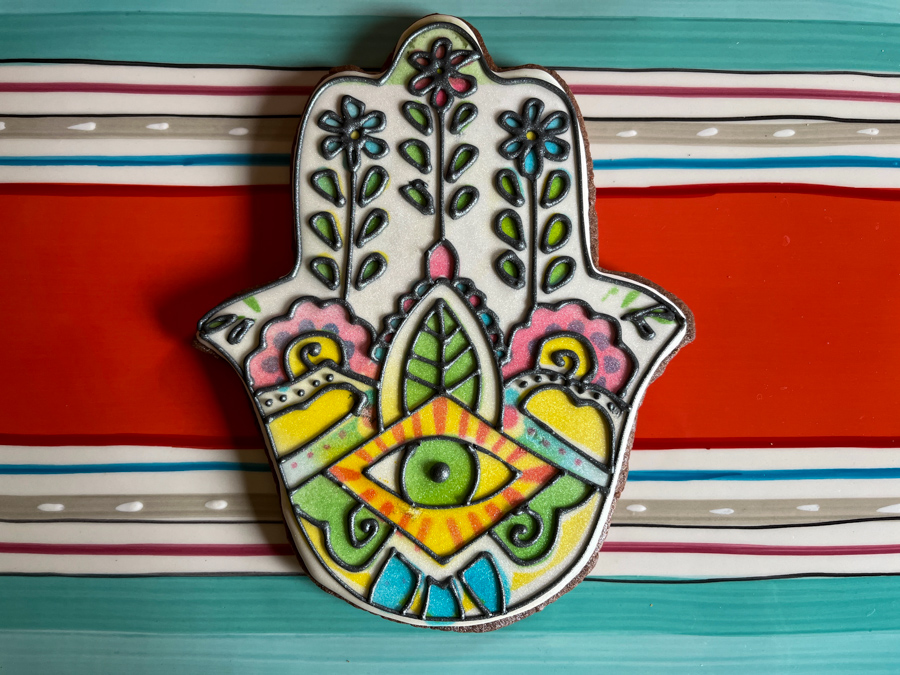
This is a very large cookie, about 7 inches tall. It needs to be large or you will have too much trouble working the details. Marlyn shared the stencils needed for the air-brushing. I had some trouble adjusting their sizes to match nicely, but managed to make the design work. It is so busy that some small variations did not compromise too much. Below you see the steps, each stencil is used in a particular order so that the colors will not only work on their own, but also combine with the previous color added, to give a different one. Super clever.

The first stencil is the yellow color, and also requires a mask (eye-shaped) so that the eye stays white. The air-brush would blow that mask away, so a little magnet is added to keep it in place – however, when I decided to tweak that layer of color, I forgot to put the magnet back, and the mask flew away, so some yellow went into the white region. Live and learn. Cookie and learn, actually. The top right photo has two colors layered already (yellow and pink). The bottom right has the blue stencil added, and finally the bottom left shows all the colors applied (yellow, pink, blue, and green). Pink and yellow at parts combine to give orange, and blue and pink combine to give purple. Once all that is done and dry, the fine line piping can begin…

It is really a labor of love, but so much fun to see this cookie take shape!
I made a second one the following day because I felt I needed to practice. And decided to try filling the outlines with a food pen instead of piping Royal icing. It gives it a different look, and it is considerably easier to do, so keep that in mind. In this case, I flooded the background with gray icing. And added a spray of PME luster over the whole cookie once it was dry.

Every once in a while, I try to challenge myself by making a cookie that scares me to death… this was one. Huge thank you to Marlyn, who manages to demonstrate every single step so well that common mortals feel like they just might be able to cookie-it!


Leave a comment