AMY’S TROPICAL TREASURES
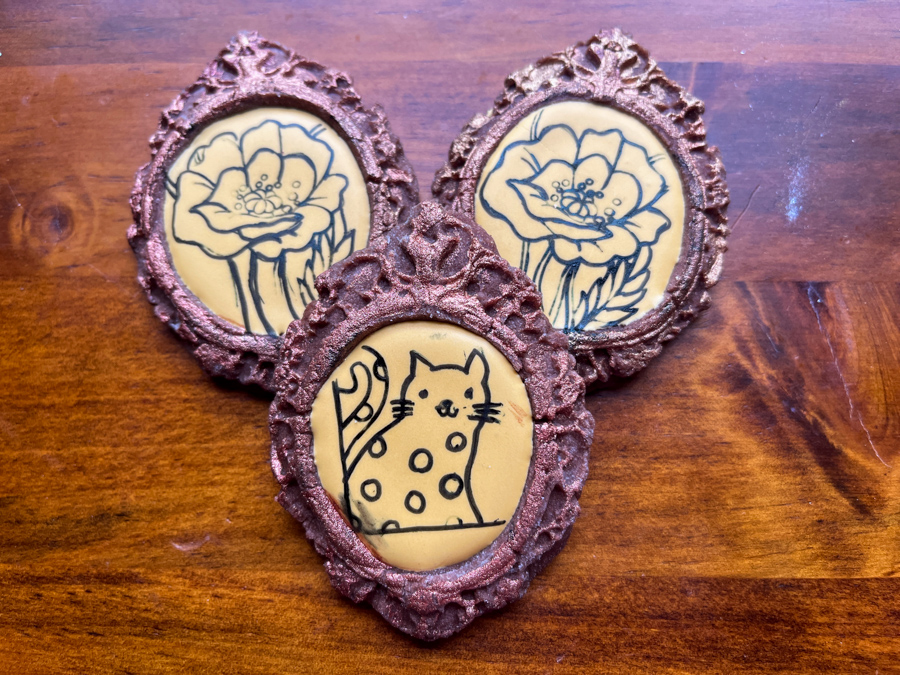
To join Amy’s Facebook group and be on top of future online classes, click here.


This is the 8th online lesson I took from Amy… time flies when we are having so much fun, right? This lesson was medium to advanced, and as is often the case with Amy’s designs, lots of different techniques were involved, often several in a single cookie. There were three videos before the online event to make sure we had all the preparation done correctly. Without further ado, here is the full set of my tropical babies!


There were seven cookies made as the main set, and we also had the option of making a few more in the shape of half-hexagon.


Below you can see all the prep work for class made the evening before…


Some pieces are painted fondant, some are Royal icing transfers (like the hibiscus, made in two stages, flower and stamen).

Of all the techniques involved, the one I need to get better at is stenciling with thick royal icing. I have issues keeping the stencil in place (even using the frame to hold it), and making a smooth layer. We did three different cookies, one with a solid color to stencil, and the other two with two-tones (purple and green). I had some issues with each of these three, but in the end they got other decorations on top and I did my best to hide the “boo-boos.”


Let me highlight some of the cookies and list the techniques used for them…


Flood with purple. Two-tone stencil with thick Royal icing. Flower is painted fondant. Leaves are fondant and Royal icing transfer.


Flood with purple with texture (embossed paper). Brush embroidery flower. Leaves are wafer paper and fondant.


Flood with green and diamond dust for shimmer. Royal icing stencil. Hibiscus flower is Royal icing transfer. Leaf is painted fondant.


Flood with solid purple. Royal icing transfer for hibiscus flower and leaf. Maybe my favorite cookie of the set.

I loved this class and the use of very few colors to make all cookies, so that they flow together beautifully. Purple, green and ivory, in different shades and textures. Perfect for a wedding or as a Birthday gift for a special friend. Thank you so much, Amy, you ARE a master teacher!

ONE YEAR AGO: Jeweled Butterflies

FRAMED FLORALS


Many occasions can be celebrated with floral cookies… engagement parties, weddings, Valentine’s, Birthdays… adding a frame to the design makes it even more special. Oval shapes are perfect for that. You can use a cookie cutter with scalloped edges. Or you can follow the cute idea of Marlyn from Montreal Confections, and shape the cookie using what is normally reserved for fondant: a silicone mold. Sugar or chocolate cookie dough with no leavening agent work best, making sure to bake the cookies from frozen. Once the cookies are baked, the central area is flooded and decorated.

In these cookies, I flooded the center with Royal icing in Gold, allowed it to set overnight, then stamped the designs… I thought a little kitten could look cute in place of flowers…


To order the mold I used to bake these cookies, follow this link. It takes a little bit of trial and error to get the right amount of dough in the mold, and pull it without losing the shape. But once you get the gist of it, it will go smoothly.


Using sugar cookies will give a totally different look. In the cookies below, I flooded the center with white Royal icing and then used wet-on-wet to make flowers. For a little bling, I painted the edge with luster gold.


A scalloped oval cookie cutter can give a stronger impression of a frame by piping a line on the perimeter and then flooding the center. Once that was fully set, I painted flowers using Sugarprism.


Just a few hours after I made these cookies, we stopped at Marshall’s and I found the absolutely perfect little platter! Serendipity in full force…


Another way to make a framed floral is flooding with a bright color, in this case Wedgewood with a touch of Royal blue, allowing the icing to fully set, and scratching a design with a needle, as I blogged about in September last year (visit post here)…

ONE YEAR AGO: Fun with Royal Icing Leftovers

CRACKLED ICING SUGAR COOKIES

For those who prefer a cookie with more austere decorations – in other words, not a huge amount of Royal icing – this method is perfect. Today I share two versions: one with sugar cookies, another with chocolate cookies. Two ways to embellish them, either using Royal icing piping consistency, or adding small pieces of cookie dough.

Let’s start with the white background of sugar cookies… The one in the center is the “dare to be different” cookie, with regular Royal Icing in yellow and piping consistency white for details.

For the crackled effect, brush the surface of the raw cookie with a thin layer of AMERICOLOR WHITE gel color (it must be Americolor, other brands do not behave the same way). I usually freeze the cookies for 10 minutes, then bake at 350F straight from frozen. There is a bit of a trade-off with the leavening agent: the more you add the more evident the crackled effect, but the cookies will not have very sharp edges. My default recipe for sugar cookies (click here) balances this equation well. The chocolate cookie recipe I use (click here) does not have any leavening agent, but it expands enough to profit from this technique.

For the chocolate cookies, the small heart was made using a technique I first learned from Marlyn (Montreal Confections). Roll the dough, cover with plastic wrap and press a small cookie cutter to make the shape. That gives it a very nice rounded top. Add to the cookie after brushing with the white gel color, and bake. These will have zero Royal icing.

These are very simple cookies, but might give the impression you spent a lot of time decorating them… You can also use other colors for the background, as long as you go with the Americolor brand. And no, I do not work for that company…

ONE YEAR AGO: Fun with Royal Icing Leftovers

WATERCOLOR FUN

One of the easiest ways to add a lot of color to a cookie is painting the background in watercolor. Often bakers dilute the gel dye with vodka, but I find that water is more user-friendly. The liquid takes longer to dry, which means it is much easier to get the different tones to mingle together, without areas in which the color gets overly intense. The drawback is having to wait a little longer for the painted area to dry, but I think it’s worth it. Today I share three types of cookies that rely on a tie-dye look as starting point.

DESIGN #1
ELEPHANTS

It all starts with a fully set base of white Royal icing… Then the colors are diluted with water and placed in different little spots of a paint palette. A brush with a very small amount of water is used to lightly wet the surface of the cookie, and patches of different colors are painted over the entire surface.

Once that is fully set, piping consistency Royal icing is added for extra decoration, in any pattern you like. Don’t forget to plan a little spot for the eye!

DESIGN #2
BUTTERFLIES

The exact same method is used, I love this cookie cutter (available here at etsy.com) that shows the butterflies from a side view…. Make sure to make some in opposite orientation so they can be grouped together in a more interesting array.

DESIGN #3
THE GOLFER

For this final design, after the base was fully dry, I used a stencil to air-brush the silhouette. Finally, a little bead border was added and painted with bronze luster powder.

A colorful base of watercolor can make many different cookie shapes and design shine, so consider that for your upcoming cookie adventures…

FOR THE LOVE OF A TEDDY BEAR

I fell in love with this cookie concept the moment I saw it in Marlyn’s IG page and then on her Patreon site. The twisted legs and the goofy expression won my heart. At that time, I felt the techniques involved were way out of my skill level. But I hoped that one day…. one day I would be brave to give it a try. Finally, it materialized. One little step at a time. Steps taken with twisted legs, to match the cookie spirit…

I just love this cutie pie! I opted for chocolate cookies as the starting point.. The head and legs are made from heart-shaped cutters, the body a simple oval shape. Next, a bit of “frankensteining” happens to add ears and arms to the head and body. Marlyn has it all very clearly explained in her Patreon tutorial.

From that point, you will need two tones of Royal icing for the basic components (outlining darker), and a fun technique with a plastic wrap to make the texture.

A little black royal icing for the eyes, some finishing details for nose and paws, and that goofy boy is ready to make a kid smile!

SUGARPRISM BUTTERFLIES

Sometimes we might get lazy and not want to mix a lot of different colors for Royal icing. But we still want colorful cookies… That is called a conundrum, and it is easily solved: make white icing, grab your favorite Sugarprism colors, and paint away! I cannot take credit for the idea, I simply followed the steps of Michelle, artist extraordinaire, and the very inventor of Sugarprism

Let me walk you through the steps…

First, I made an outline with dark pink, using a PME #3 tip…

Then, flood the different areas with white Royal icing, and allow it to crust for 1 hour or so…

From this point, you can leave the cookie without any added decoration, for a simple,
understated look, or add little dots and swirls to the wings.

Once all those additions are fully set, grab your Sugarprism colors
(or use a food pen), and have some fun.

Gold luster powder mixed with vodka also works quite well to add some bling…

I hope you enjoyed this simple technique, and
consider using it in one of your future cookie adventures…

ONE YEAR AGO: Cherry Blossom Butterflies

STAINED-GLASS HEARTS

As you may know, I firmly believe that love should be celebrated the whole year. Why save heart-shaped cookies for February? So here I am to share stained-glass cookies that will spread love around. You can use any sugar cookie you like, but I give you the recipe to make the stained-glass component. Just be careful when working with it, as you will take the syrup to 312F. Your skin will not appreciate any contact with it, even if it is just a tiny little drop. Trust me, I know…

It all starts with baking the cookies, making a large heart-shaped cutout in the center. Next, use Royal icing to decorate in any way you like. The center part can be decorated as mini-cookies, no need to discard them.

Now, time to make the syrup… To a sauce pan add

250 sugar  
 75g water   
50g corn syrup   
squirt of lemon juice

Bring to 312F. Transfer to a heat-safe bowl, add color, and carefully, very carefully, spoon the hot syrup into the opening of the cookies, placing them preferably over a silicone mat. Allow to fully set before moving the cookies around.

I just love the effect as the light goes through the candy component…

The stained-glass cutout can be incorporated in different shapes, and I intend to play with the concept in the near future.

For beautiful inspiration, check this youtube video….

PIRATES ROLL THIS WAY

To join Amy’s Facebook group and be on top of future online classes, click here.

One more amazing online decorating class taught by Amy from Seriously Sweet on Davis Street. Just as the trial of Mr Depp – the forever Caribbean Pirate – was coming to an end, we attacked the making of this set of six cookies. Serendipity in cookie format. The class was described as Intermediate, but as usual, Amy explains it all so clearly that even beginners could follow. Maybe not in real time, but definitely playing the video later and taking their time.

Here they are, my six babies

Amy taught us many different techniques in this class. To prepare for it, we needed to bake all cookies, flood the compass one with ivory icing, and prepare all the fondant decorations using molds and then paint them with the “dry dust method” in which luster powder is applied straight to the fondant with a brush. Three different colors of dust worked together to give the aged look of coins and compass. Brilliant! Notice that the pirate’s head is a Christmas ornament cookie cutter. Cute cookie cutter flip…

Once all the fondant pieces are painted, the fun begins….

The most elaborate cookie was the treasure chest, maybe… All the small details that Amy planned for it, made it super special in the end. You can see some of the steps below. The cookie cutter used is originally to make an open book, and we did some trimming and shaping with a Microplane before decorating.

By piping the edges and then painting with gold (I used a mixture of gold and copper dust), the whole design comes to life. Then, all you need to do is place the pieces to decorate, flowing out of the treasure chest.

The two trickiest components of this class, in my opinion, were the fondant skull and the black net, made with Flextfrost sheets. I had to make the skull several times, it kept breaking as I removed it from the mold. I had to use a heavy hand with cornstarch, and freeze it overnight to get one piece to come out whole. And the Flexfrost sheet is temperamental. You need to hit the amount of water right, and also the extent of drying before pulling it out of the mat. But, all things considered, there was light in the end of the cookie tunnel.

Another cookie that involved several cool techniques was the treasure map…

The texture is made pressing a gloved finger delicately on the surface after it has crusted for a while. And the details with food pen are aged with vodka.

A cute pirate and his rum bottle were the simplest cookies to make. My pirate has a congenital problem in the ears, but he is a happy pirate. When he manages to control his friendship with the bottle of rum, he is quite good at negotiating the compass….

Amy, cannot thank you enough for yet another great Saturday afternoon in your company and the company of all the other cookiers. Even if only virtually.

ONE YEAR AGO: Sugar Cookies, the Groovy Series

MARBLED ICING

As far as a high-impact design requiring very basic piping skills, you cannot beat marbled icing. These cookies were all made with this technique designed by Haniela. You can use anywhere from five to seven colors, but I made some using only four. The marbling is not as dramatic in the end, but the cookies are still quite beautiful. You can use one single color and simply vary the intensity, or add two different colors, each in two or three shades. It all starts with piping the outline (using the darkest color), then some horizontal guide lines to separate the blocks of repeating tones. Working quickly, pipe lines of each color and marble them in two directions using a needle. Piping the border is optional, but it does make the cookie more elegant.

Below, some of the steps to make this type of cookie…

The piping of the stripes does not have to be perfect, as everything will get mixed up by marbling. The only thing to keep in mind is working reasonably fast, otherwise the icing will start to set and it won’t pull smoothly, the surface will be all bumpy.

The same design using brown-orange-red tones…

Some of the borders I left white, some I painted with bronze…

For these cookies I used 6 different colors, including white. In some cookies I omitted the white, using just the other colors.

Finally, a blue series, with border in gold luster.

I love this cookie shape. It is perfect for marbling, but works with many different designs also.

ONE YEAR AGO: Sugar Cookies, Black and White Series