

Marlyn has a super detailed tutorial available in YouTube for the bunny head (click here). If you are a member of her Patreon site, you’ll find the stencil file to make decorating the cookie easier (click here).
I opted for a chocolate cookie, so I air-brushed the design in white over the naked cookie as a starting point. The stencil is used again over the iced cookie to add the final details.
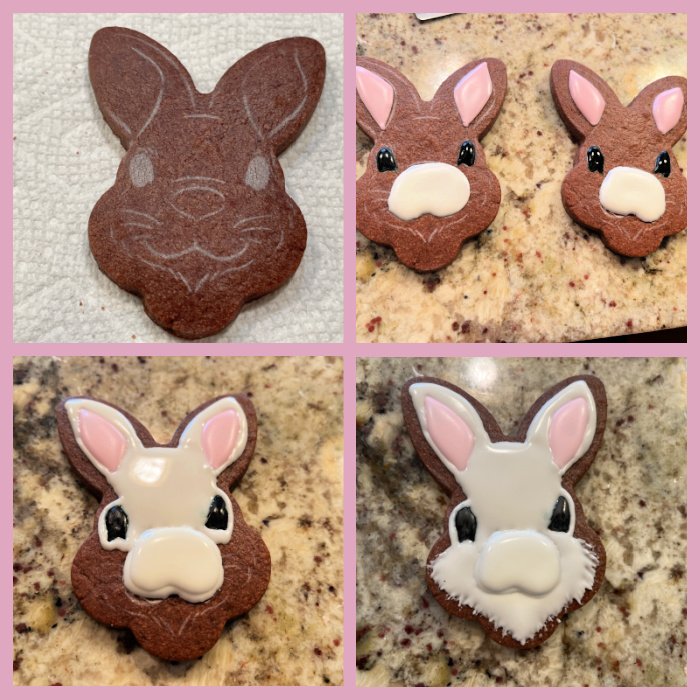
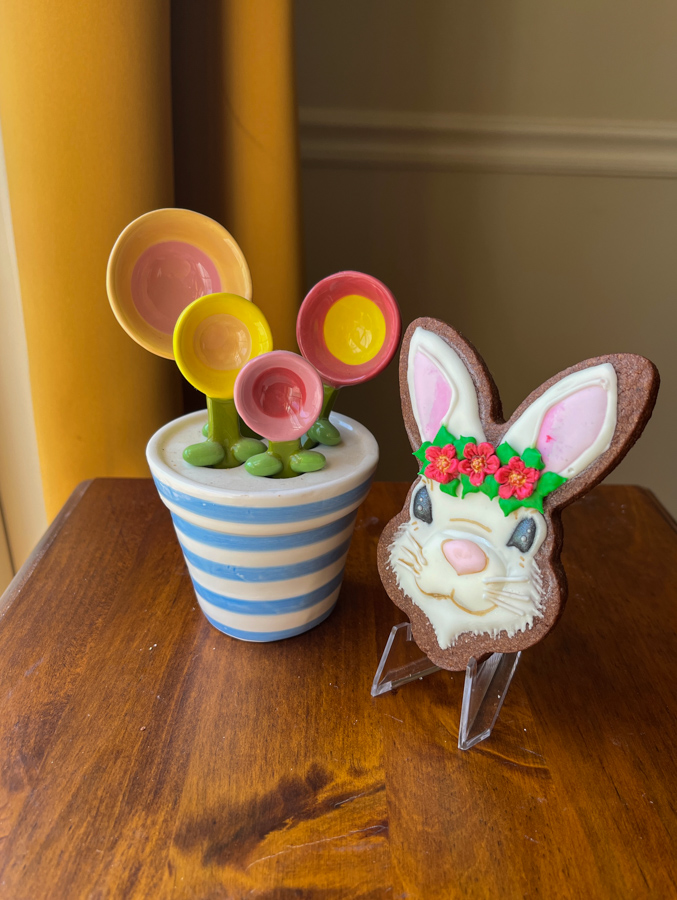
Marlyn piped the floral design on the cookie, I made my life a bit easier by using fondant decorations, and the piped small leaves to tie the design together.
MOVING ON…
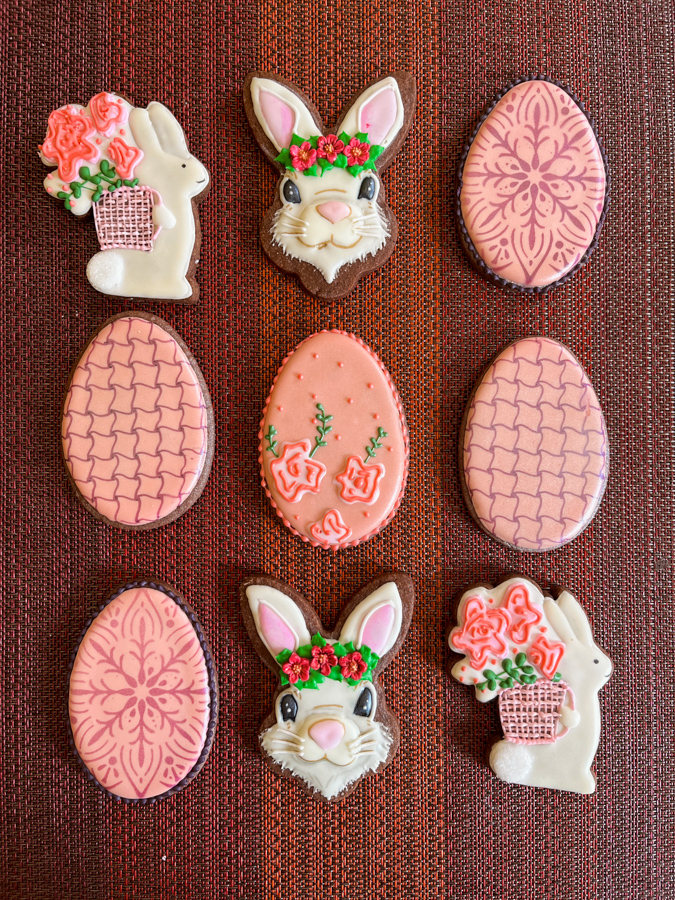
For the bunny with a basket, I followed a tutorial available in Cookie-a-thon by Lauren Jacobs, aka The Cheerful Baker (click here for her IG page). Some of the steps are shown below…

I modified a few details in the basket and added a little facial feature. I love this cookie shape!

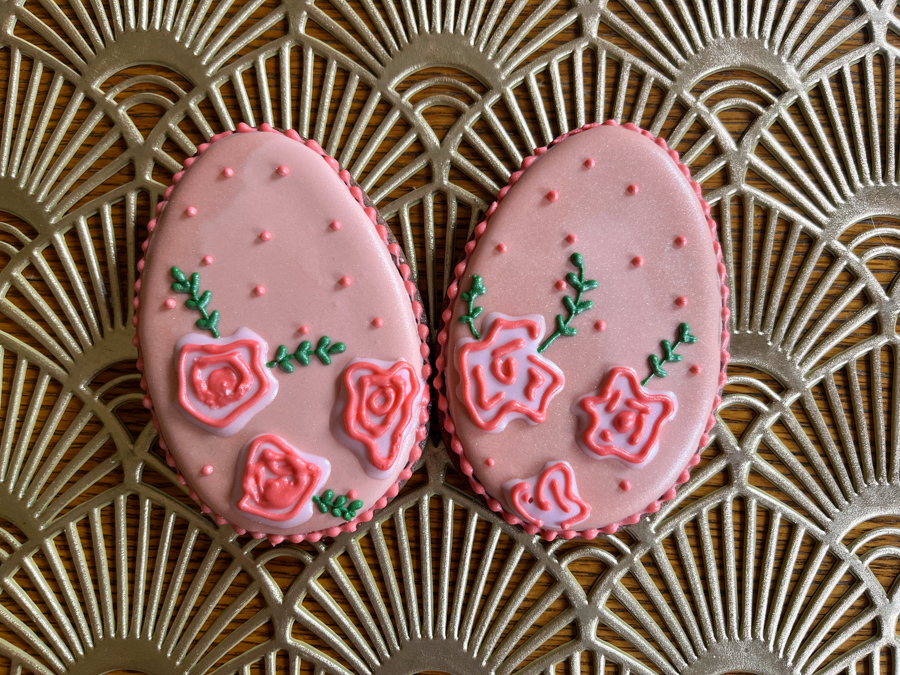
To go along with it, I used a similar technique for florals to make Easter eggs.
I could not help but make a Zentangle design, so it all starts with dots equally spaced on the iced cookie, and then a little drawing with a food safe pen. PME pearl luster spray gives the cookie a shine I really like.

So here is my little Easter collection…
I close this post with the Naughty Bunny, made after a tutorial from Timbo Sullivan during a Facebook live. It is mostly fondant, so if you don’t like the taste, consider the cookie just as a decoration. Lots of different techniques were explained in his tutorial, and the take home message for me is that I need a lot of practice to make eyes. His work is flawless! But I still like my little Naughty Bunny… Everything is fondant, except the pink details on ears and paws, and the grass the bunny is sitting on.


Leave a comment