For a non-native speaker of English, some expressions can be quite amusing. Bear with me is definitely one that makes me smile because no matter how hard I try to avoid it, the image of a teddy bear jumps in my mind. Playful and cute. So, bear with me as I go from English to baking. Sugar cookies, sandwich cookies, macarons. With bears in mind…
THE LITTLE PANDA BEAR

This design was based on a picture my niece Carla shared in our family whatsapp group. I knew I had to “cookie-it”. So I used the mini-projector to draw the basic design, and then applied the same technique used for bunny rabbits in previous posts. Sugarprism was used to paint the body. The only additional detail was piping non-adjacent sections of the bamboo, allowing to set and then pipe the remaining parts. This way the stalks are more realistic. I used a food pen to make the leaves.

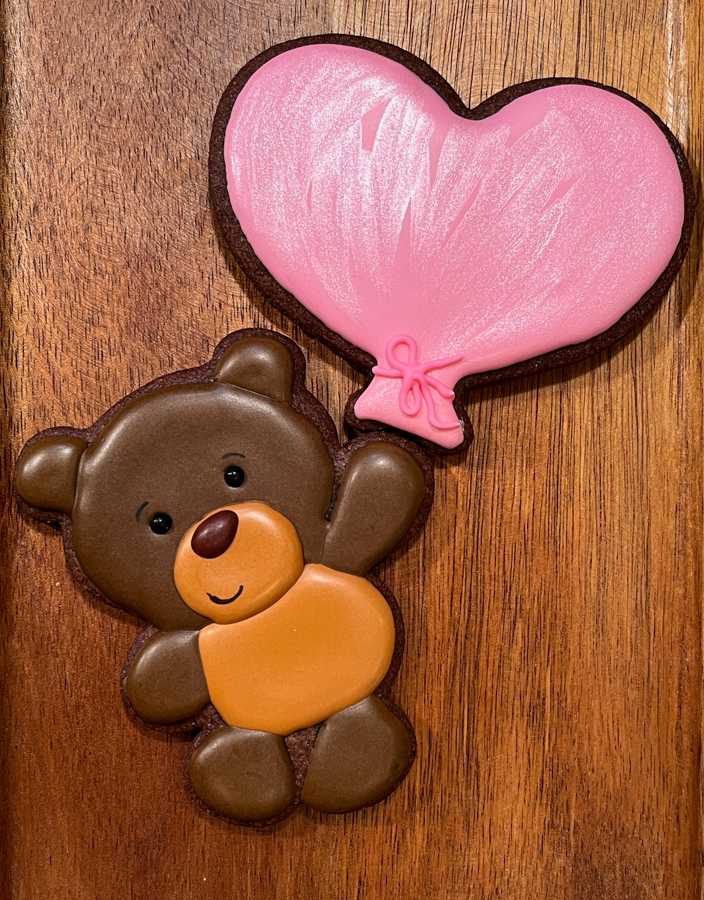
BEARS WITH HEART BALLOONS

The cookie cutter set used for these cookies can be found here. I love Semisweet Designs! Not only they sell unique cutters, but they share blog posts with ideas to decorate them.
Below I show some of the steps to bring these little bears to life… The ears, arms and legs get a small amount of icing that is allowed to set before fully flooding them. This prevents cratering, which might happen in such small areas.

The eyes were 4mm black pearls from PME, added right after flooding. Finally, after the cookie was fully set, I painted the balloon with luster powder, added the eye details and smile, and a little ribbon to tie the balloon.
KIM-JOY’S LITTLE BEAR SANDWICH COOKIES
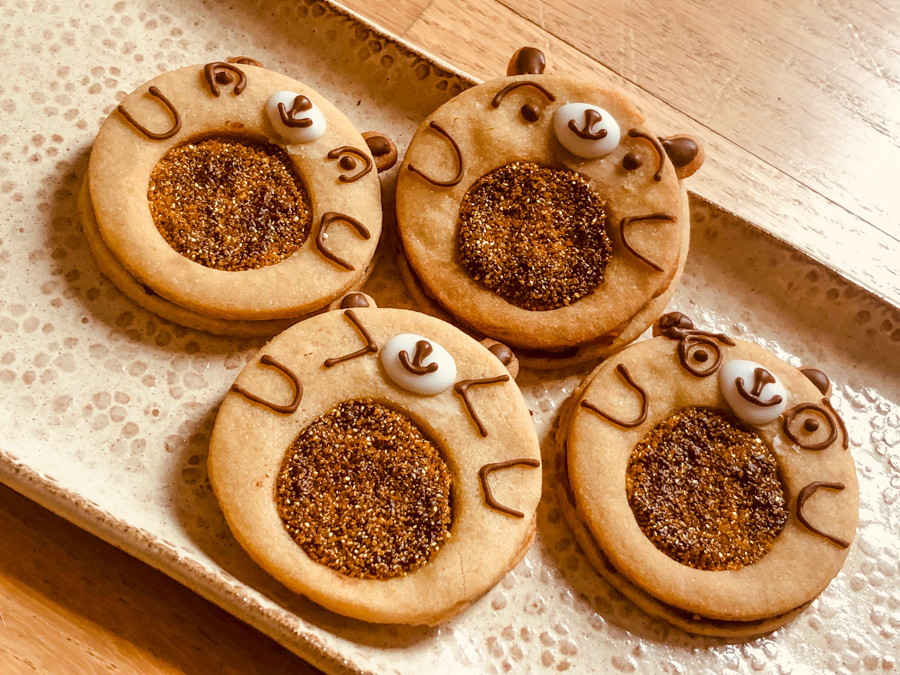
Kim-Joy always makes the cutest productions celebrating animals, and this is a good example. You can find her recipe here. Bake a full round for the base, and a top with a slightly off-center hole. All you need then is a bit of ganache to sandwich the cookie, sprinkles, and Royal icing details. For the ears, I baked tiny little rounds of cookie dough, and inserted in between the two cookies, the ganache worked well to keep them in place.

TEDDY BEAR MACARONS

For these macs, color most of your batter brown, and separate a very small amount without any color, adding it to a piping bag with a very small round piping tip. Then pipe rounds with little ears, and add a touch of light batter for the nose area. Bake, fill, and then use a food safe pen to add the eyes, mouth and nose. The filling for those was a ganache noisette (recipe available in my food blog here).

Because this is a very simple design, a French meringue recipe (like this one) will work well. For complex drawings with multiple colors, most people prefer Italian meringue because it is a lot more stable and gives a larger window of time to work.
I hope you enjoyed this small selection of bear cookies.
Stay tuned for more sweetness in cookie format soon…


Leave a comment