Time goes by so fast! Marlyn from Montreal Confections published this tutorial in October 2021, at that time I got the embossing plate for it and blinked twice. That took me to October 2024. And here we are…
I will not lie to you – I never do – this is a bit tricky. Here is the set you’ll need to make this cool cookie being.

I bought it at Temu and it is not available anymore, I could not find it in amazon or etsy, but you might be able to find slightly different designs and sizes. The acrylic plate is used to make an impression on fondant (it will work on modeling chocolate and I suppose also on rolled buttercream). You will then cut the shape with the same cutter used to cut the cookie.
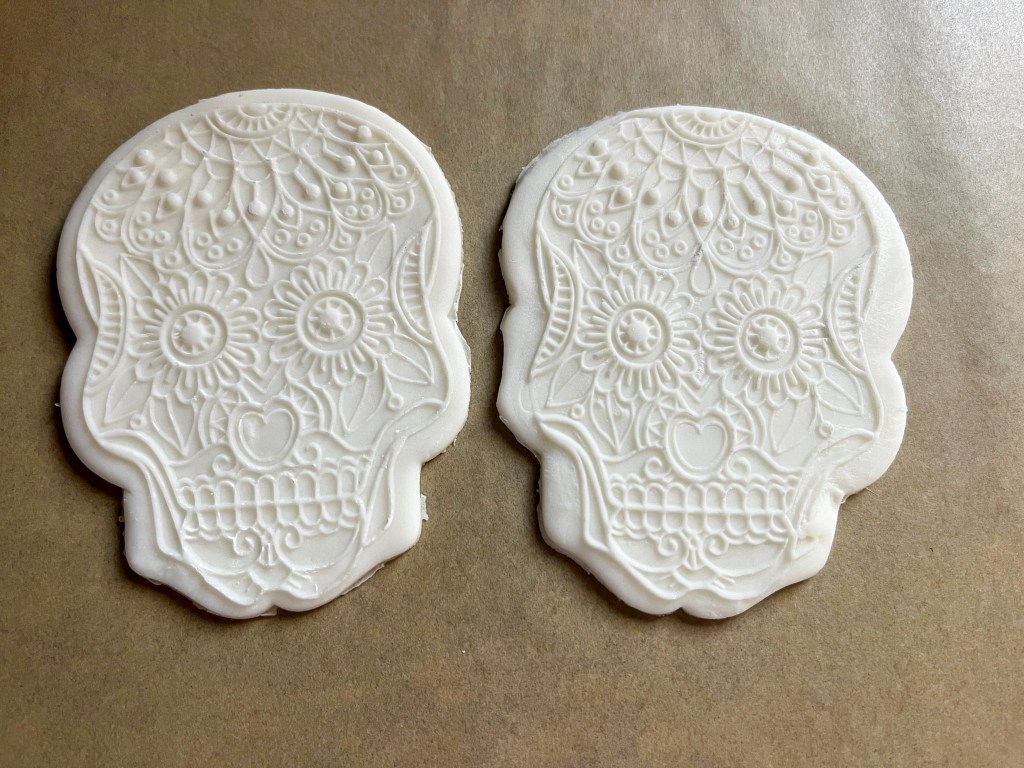
Several things can mess up this step. The fondant needs to be dry enough that it won’t distort too much as you pull it away from the plate, but not too dry or the impression won’t form. It is a bit of an exercise in patience. Once that is done, the real fun begins! Air-brush several colors around the design.
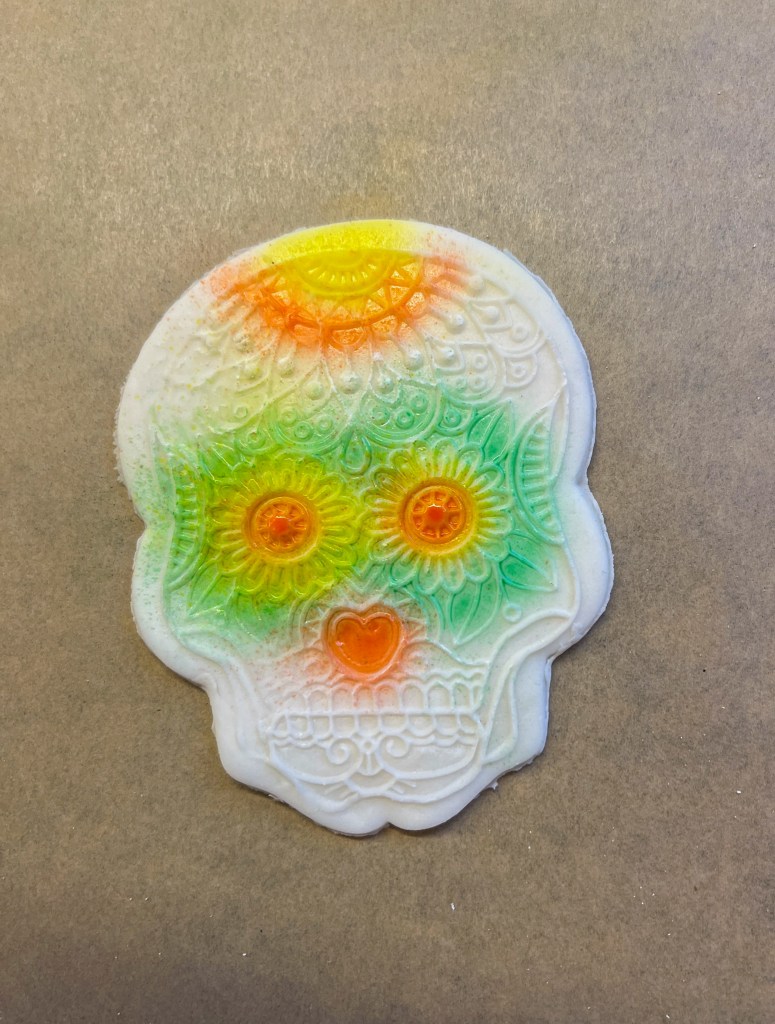
Keep in mind colors will mingle. What you see in coral above was actually pink but I air-brushed on top of the yellow and that changed it a bit. Keep that in mind when you pick your colors.

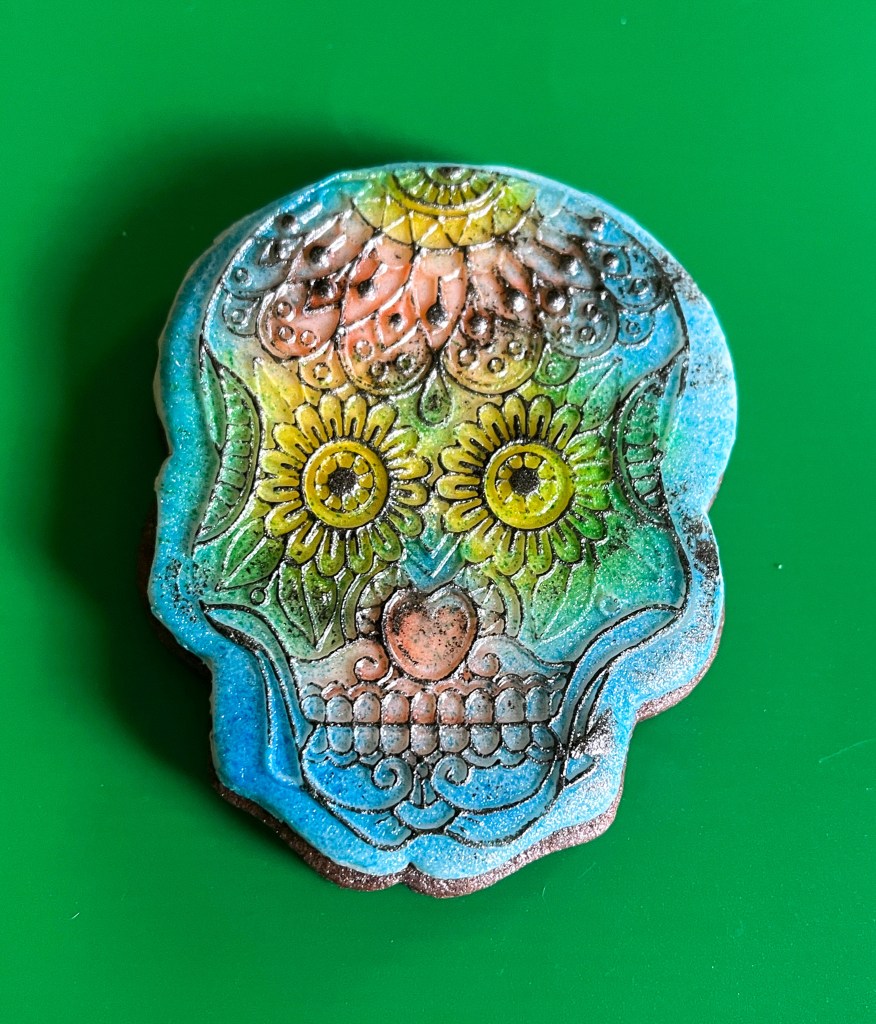
At this point, it is important to allow the dye to dry completely or you will risk severe smudging on the next step, in which you will use STAMP DYE applied with a makeup sponge, very very gently on the raised design.

That step brings the cookie to life, which is odd, considering it is a skull, after all… ANYWAY, I absolutely loved this technique, even if it shaved off a couple of months of my life expectancy. A little PME luster pearl spray hides a multitude of skull sins. And quite a few from the baker.

ONE YEAR AGO: Scary Bakes go On and On
TWO YEARS AGO: Marlyn’s Inspiration for October
THREE YEARS AGO: Let’s Get Spooky!


Leave a comment