Everybody needs a nice pair of boots, even if they come in cookie format… Today I share a first version out of two I’ve made recently. It comes from the super cool design from Marlyn, shared in a Patreon tutorial (click here to join her site, best investment ever if you want to improve your cookie decorating skills).
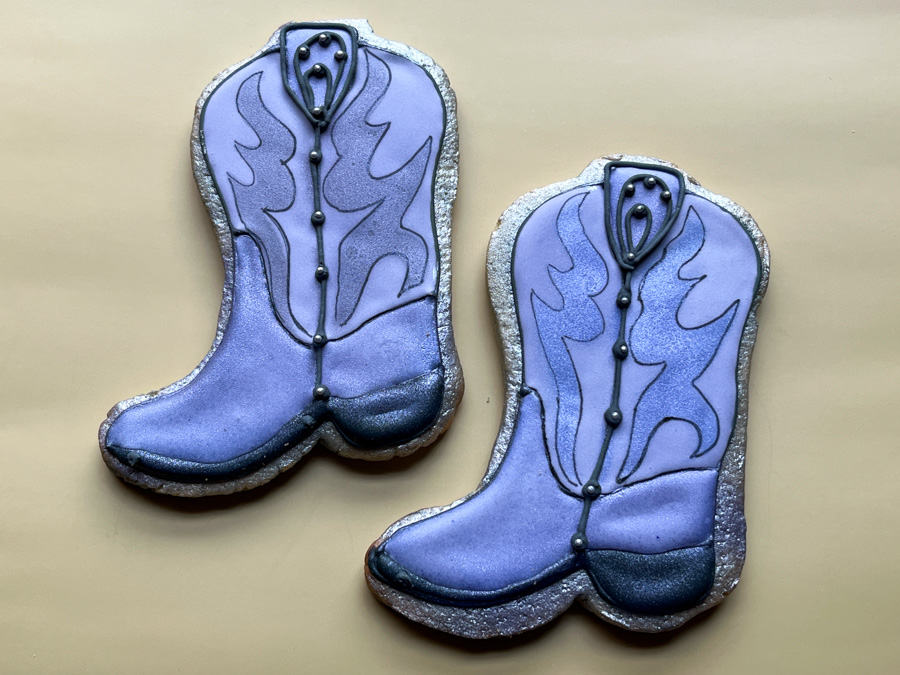
I love their look and would not mind at all owning a pair just like that to parade the streets of Manhattan, Kansas. I consider these cookies an advanced project because you need to use several techniques: air-brushing with and without stencil, flooding in sections and piping fine lines. Below some of the steps involved, all very clearly demonstrated in her video tutorial and the PDF booklet with extras like her recipe for cookie dough and Royal icing.
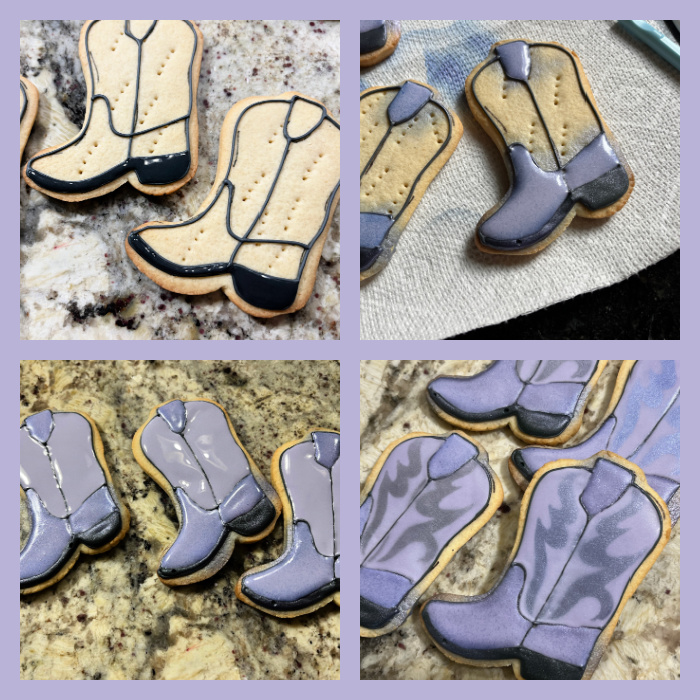
The final step, piping black lines and adding little pearls, really makes the cookie shine. Piping the outline of the air-brushed design is the most difficult step, I did it for two of the cookies, and the other two I simplified and used a black food pen with a fine tip.
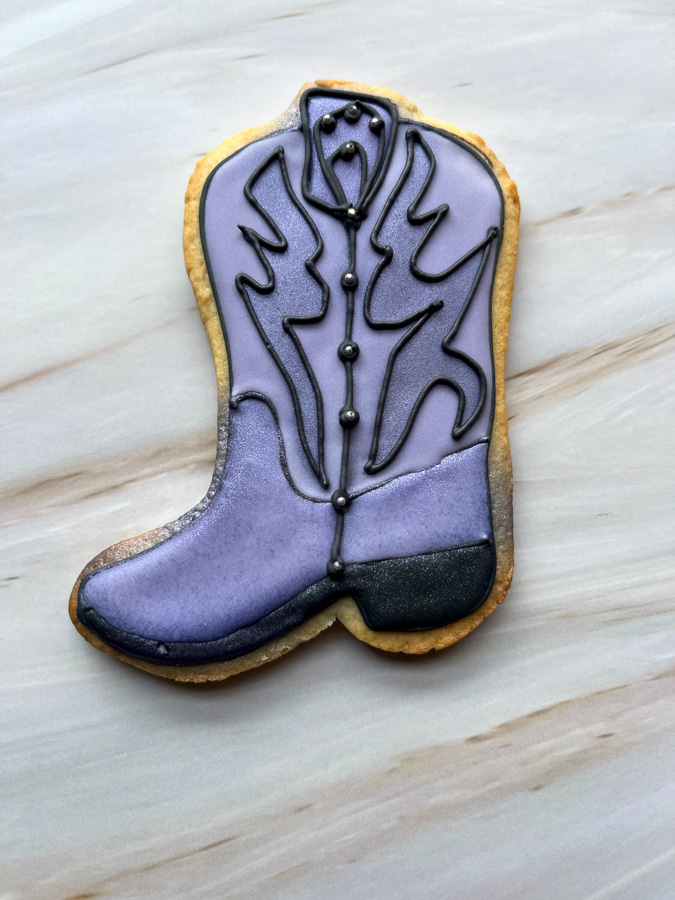
I am not sure which one I prefer. Phil definitely likes the one with the piped outline better, but maybe because I notice all the little boo-boos, I prefer the other one. Still, they both made me quite happy, as I know I could not have made them a couple of years ago. Nice to realize there has been some improvement in my cookie decorating journey!

.
ONE YEAR AGO: Sunflowers for Ukraine
TWO YEARS AGO: Eyelet-Lace Strawberry Cookies


Leave a reply to Darlene Cancel reply