HENNA INSPIRED VEGAN MACARONS
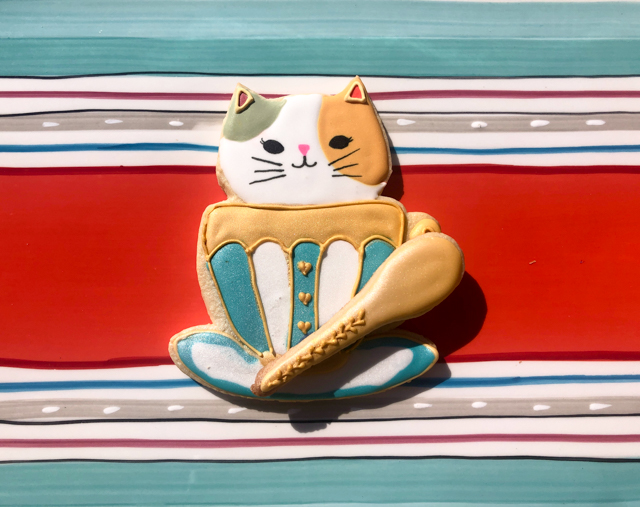
This is a sister-post for my main blog. In that post, I painted flowers on the macarons with Sugarprism, following a tutorial online by Michelle Ingalls. I only needed 12 shells for that class, so here I show you how I decorated the other half of the batch: mini-projector and a little patience. Gold luster mixed with Everclear added some bling to selected areas of the design, but that is of course optional.

The vegan coffee ganache is luscious, a pleasure to pipe. Recipe available in my post published yesterday in the Bewitching Kitchen.

I normally like to pipe some mini-macs because they look so cute. To decorate those, I used a stencil and airbrushed black stripes, then painted some gold by hand with luster powder + Everclear.

This was my first time using the mini-projector to decorate macarons. It is a little time-consuming but I love the overall look of the henna-design. Come to think of it, chai-flavored ganache or buttercream would pair well with this decoration…

CAT IN A TEACUP

Teacups are cute. Cats are cute. When you join them both, the Cuteness-meter goes nuts. I cannot take credit for the idea, I simply followed Marlyn in one of her video tutorials. You can join two cookie shapes if you have the appropriate cutters. I did not have anything that would work well, so I cut them by hand.

I made some with my default chocolate cookie recipe, and some Sugar cookies flavored with Elderflower (Olive Nation essence). Once the cookies are baked and cooled, the basic design is added with a food pen, and sections are piped with Royal icing.

The spoons are baked separately. To decorate them, I used Gold royal icing coupled with gold air-brushing.

The fine gold lines really make the design come to life. I was terrified of messing up the cookie in this final step, but overall I am pretty happy with the outcome.

These cookies were part of a gift for dear friends who are cat-lovers. So in the package a few other kittens were included.

I think what I love the most about cookies is making up a gift-set. Thinking about a theme the person will like, a color scheme, I find the whole process absolutely wonderful.

A WELCOME TO FALL

It is that time of the year. Temperatures will drop, and the trees will soon change color. These cookies are my little shout out to Autumn. Some inspired by Marlyn, from Montreal Confections, and adapted to my skill level.

I fell in love with these cookies the moment I saw the video by Marlyn. The challenging part for me was piping the basket, and I do need more practice, but overall I am happy with the outcome. You should definitely see Marlyn’s version, because she added a little bear peeking from inside the basket, the cutest little detail (Instagram entry here). I simplified it by using fondant flowers instead. The chocolate dough is my default, by the way. I sent these cookies to a dear friend, and used the smallest amount of chipotle, as I did not know her take on the pairing of cocoa with pepper…

The cookie cutter I used was this one. It all starts by piping an outline for each balloon section, and piping the basket weave. Then, flood the different regions according to your choice of pattern (dots, swirls), and you are almost there. Some fondant decorations and additional piping is all you’ll need. I had some leftover Royal icing which I put to use in my Hexagon Ode to Fall. I had no idea where I was going with it, but I liked it a lot. It ended up with an ET-meets-Aztec aura…

Another cute cookie project conceived by Marlyn (her creativity is unreal), involves the candy corn shape. Recently I got a special cutter that makes four small cookies at a time. It is what I’ve used in this fun batch. Check her IG post for all details.

This is a much simpler project, although it does require the piping of fine lines as a starting point. You can get by without them, but some of the visual impact will be lost.

The final detail is a little luster powder in red or pink to make the cheeks blush. I tell you, my friends, cookie decorating is all in the small details, and if you follow the artists out there, you will learn a ton from them.

BRUSH EMBROIDERY

This might be the technique I struggled the most with. My first four attempts were huge failures, but I kept trying. My advice, in case you’ve experienced the same, is to focus on the consistency of the Royal icing, and practice on a piece of parchment paper or, if you have one, a plastic fake cookie like this. Don’t put pressure on yourself trying to decorate a cookie you have a special friend in mind to offer to. Once you get comfortable with the consistency, you are 80% of the way there. Today I share a few examples, made in the past three months or so.

I think these might be my favorites, but oddly enough they were born from a little mistake. When I made guidelines for the pattern, I used a yellow pen, thinking it would not show after piping the details, but unfortunately it was obviously there, underneath. I then had the idea of using yellow luster powder and gold to paint the design, so that the lines would not be noticeable anymore. Worked like a charm, and I must say I was quite proud of myself.

The same basic design works well as white on any color you like…

The one below I did not quite get right the embroidery effect, so I decided to paint the design to make it work better. The bottom line is, even if you don’t get it 100% right, you can add some color, a bit of Diamond dust, and all will be fine.

Inspired by the great cookier Amber, I used a two-color embroidery, which is actually quite simple to do. You pipe the first color at the outer edge of the design (in this case white), then the second color right next to it, and gently pull them with a brush. The second color was Fuchsia, from Sugarflair (thank you for the wonderful gift, Caro!). These were piped on a naked chocolate cookie, so you don’t really need the royal icing base to make it work.

I shared this final cookie in the past, but I will include it again here, because it is a nice departure from brush embroidery conceived by Amber, in which the effect with the brush is made on a wet-on-wet base. Give it a try, it is simpler because you can use regular flooding consistency.

I love the elegance that brush embroidery brings to cookies. And when I speak of elegance, someone comes to my mind right away…

I hope you enjoyed this small collection of ideas for brush embroidery. It is also a nice method to use for bee’s wings as I showed not too long ago.

Stay tuned for a next adventure in cookie decorating, which will bring a Fall atmosphere to the blog.

ROYAL ICING ETCHING

This is a very nice technique to play with, and deceptively simple. All you need is to flood a cookie with icing, preferably a dark color. Let it fully set overnight. Then, use a mini-projector or any other method you like to get an image on the surface. Keep in mind that the final drawing will be made by hurting the surface of the icing with the tip of the scribe tool. That will be a very thin line, so any food pen you use to mark the drawing will show because it is wider. That’s why in this case a food projector or free-hand drawing will be your best options. Once you scratch the design, you can brush the surface with a super light dust of pearl luster powder (dry, with a soft brush), to make the image brighter. This step if optional, but it does improve the final cookie. I first used this method last year, but only added some straight lines to a decorated cookie. My friend Dorothy pointed me to some Instagram posts in which they used etching to draw simple flowers. I loved the idea and made my own versions.

You can leave the design simple, as a white on dark drawing, or go one step further and use additional color like I did in this one, in part because the background was a bit light and the drawing too faded.

I find that for this type of design a border around the cookie adds a touch of elegance that complements well the look.

The possibilities are once again, pretty much endless… And you can mix decoration styles and colors to a platter of cookies, to add contrast but keep the elegant aura going. Along those lines, I believe that brush embroidery and a simple etching design go very well together. What do you think?

I am definitely going to explore this method further in the near future, and I hope you’ll give it a try!

HEART OF HONEY PIZZA BOX COOKIE

My final (for the time being) pizza box production, this time the inspiration came from Marlyn, with some minor modifications (IG video available here). Her original box is very clever, it was made as a gender reveal thing. Each little bee in her box was a cookie filled with a particular color. As you bite into it the gender is revealed. My little bees are simple molded fondant, and I incorporated some flower cookies and other small details around the center. A pizza box perfect for a little girl who is sweet as honey…

All cookies were chocolate, and the base was cut in a heart shape and then four pieces around it, to mimic a tree bark. The texture comes from laying a piece of wrinkled parchment paper on top of the Royal icing as soon as it is piped. That sits for many hours (overnight is best), then you can peel the paper and get the design to stay. I brushed some gold luster powder to add more contrast. You can see Marlyn demonstrating that technique here.

To get the subtle pattern on the heart, Marllyn air-brushes the image with a stencil, then uses those lines to guide the piping with Royal icing. Once that sets (30 minutes is enough as the icing is thick), a very thin royal icing of the same color is gently brushed on the surface. I finished with a little gold air-brush on the edges.

For the little flowers I made the centers as Royal icing transfers, covering them with silver non-pareils. After all the cookies are decorated and fully set, the final scene can be assembled inside the box… The little butterfly is also molded fondant.

My favorite component is the center heart, I find it very sweet and charming…

So that concludes my trilogy of pizza box cookie scenes. I am sure I will be making new ones in the near future, because I love the concept and it is so nice to adapt it for a particular occasion or person.

Pizza boxes, 7-inch square available at amazon.com

JURASSIC PARK PIZZA COOKIE BOX

As I promised, here is my second pizza box cookie, made to please a certain young boy who is fascinated by all things dragon. For a change, I did not follow any particular design, made this one from my own imagination. Baby steps, my friends. Baby steps.

I baked the base divided in two parts, one for the sky (with a cloud made with wet-on-wet icing), one for the grass field. Two dinosaurs and a little palm tree to complete the scene. Sugar cookies were flavored with orange, and the dinosaurs were made with a chocolate dough.

The sky was decorated with luster powder in baby blue, and got the silhouette of a Pterodactyl in full flight…

The green also got a little more detail by air-brushing in copper a few spots here and there. Same copper tone was used to brush the tree trunk, just ever so slightly. Then, all that was left to do was decorate the dinosaurs and assemble the scene…

I think I need a new dinosaur cookie cutter, so that my next box will include two different species of this important extinct family. Maybe a little lizard could go well too, although it’s important not to crowd the box too much. A tiny lizard? Yeah, that will do…

Stay tuned for one more Pizza Box Cookie Scene!

MARLYN’S PIZZA BOX BEACH COOKIES

I’ve been excited about cookies more than once. Who am I trying to fool? Countless times, I admit. But I am just over the moon with these. Marlyn came up with this cool idea of arranging cookies inside a small (7-inch square) pizza box (available here), and I totally fell in love with the concept. This first one I made following Marlyn’s tutorial pretty closely. Perfect for the summer, my favorite season.

The idea is to fit the cookies to form a scene inside the pizza box. Marlyn shared templates for her Patreon supporters so that you can cut the cookies to fit. Check her site here.

First you bake the cookies and make sure to trim them if needed, using a microplane. I actually did not need to do that, they all fit nicely together.

Next, decorate each cookie according to her detailed tutorial, or using your own ideas and color scheme.

The trickiest part for me was piping the weave pattern in the bag, I almost decided to skip it, but I’m glad I gave it a try. Mine is far from perfect, but I am happy with it. It is a bag that has seen a few Summer vacations already…

Once all the individual cookies are decorated and fully set, comes the fun part, assembling the design!

Isn’t this a fantastic concept? The possibilities are endless, boxes designed for Halloween, for Valentine’s, for a wedding anniversary, anything you can dream of. Marlyn keeps adding new versions and I keep dreaming…

Stay tuned for two more versions of Pizza Box Cookie scenes… And make sure to check Marlyn’s IG page to get truly inspired…