Today I share three cookie designs for your favorite golfer…

.
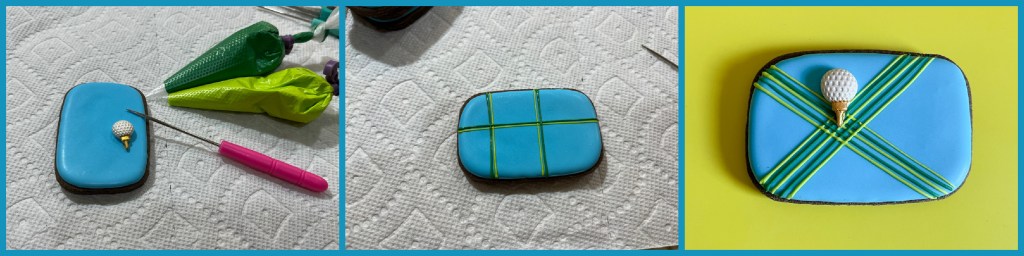
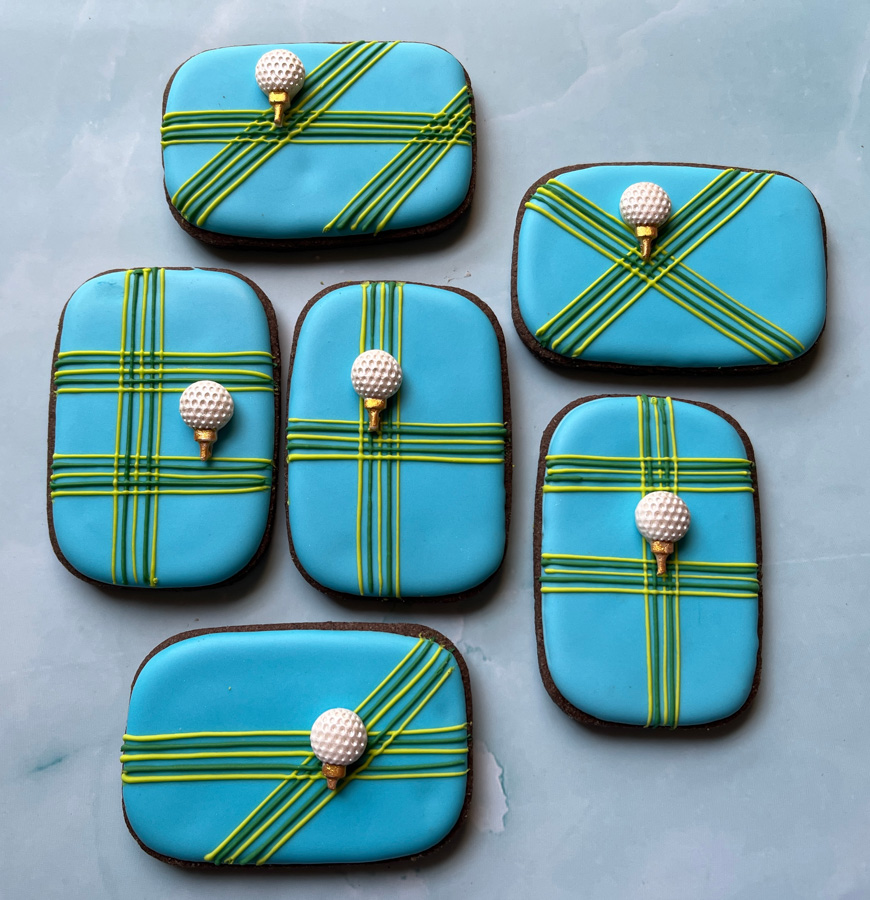
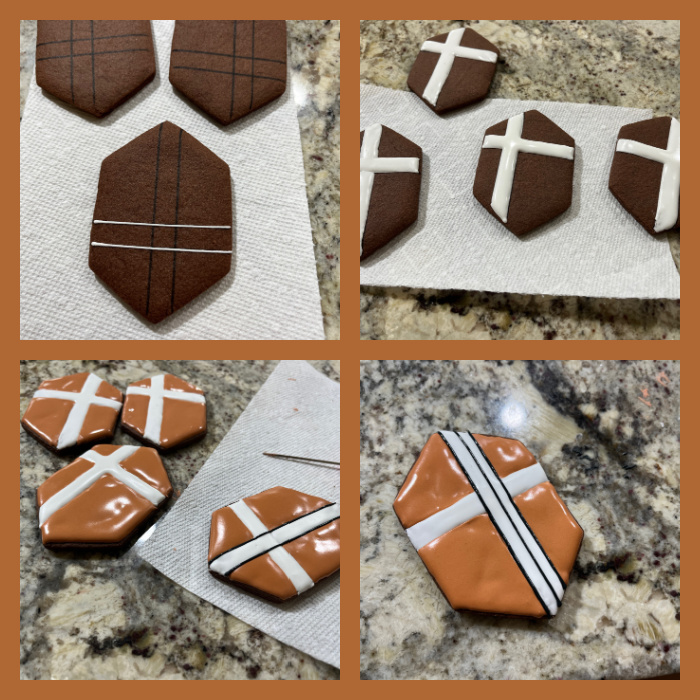
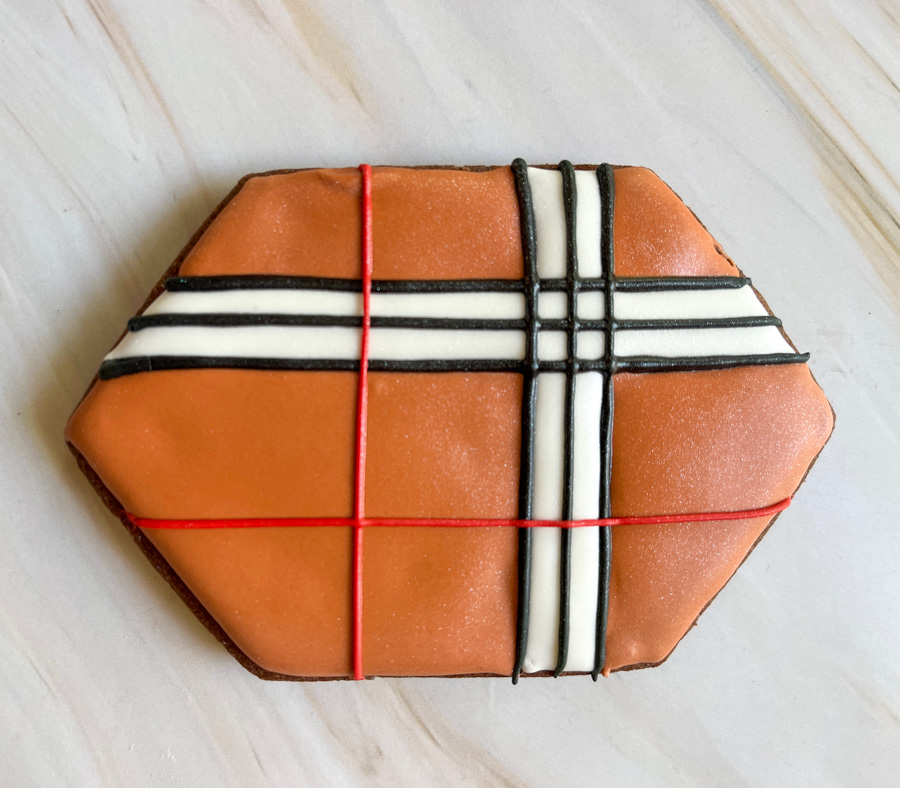
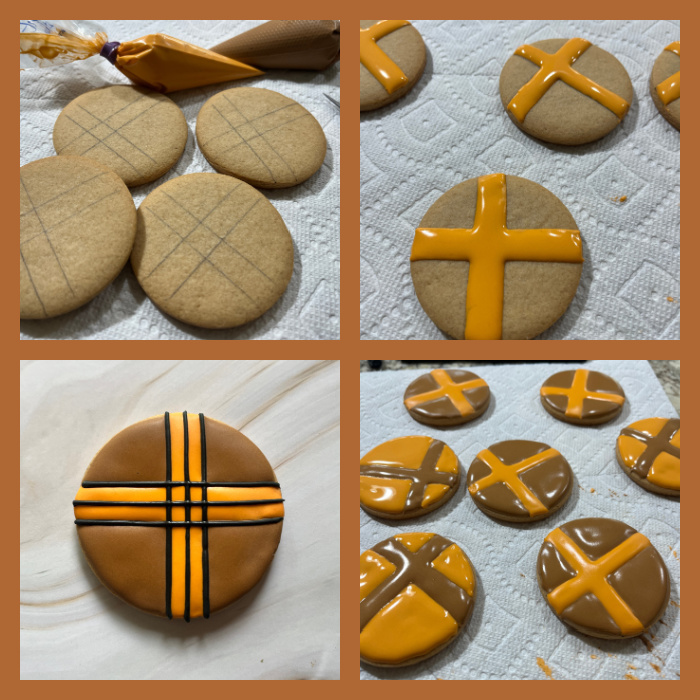
THE ARGYLE PATTERN

Any cookie cutter shape will work, round, square, oblong. All you need is a stencil, in this case I cut my own, using two components: the basic diamond shape and the black lines to lay over them. Cutting the stencils was a lot more trouble than I had anticipated, so I advise you to buy a set online and save you the grievance… (wink, wink). It was just pretty tricky to get the dimensions of the two patterns to match perfectly.

Once you have the stencils, flood the base with white the day before, so you can have a fully dry surface to set the stencil and air-brush. I used blue for the diamond and black for the lines, all from Cookie Countess colors. The final detail was the golf ball made of fondant. If you only have a diamond stencil, you can also use that and then add black lines with a ruler. But it will be quite a bit of work.
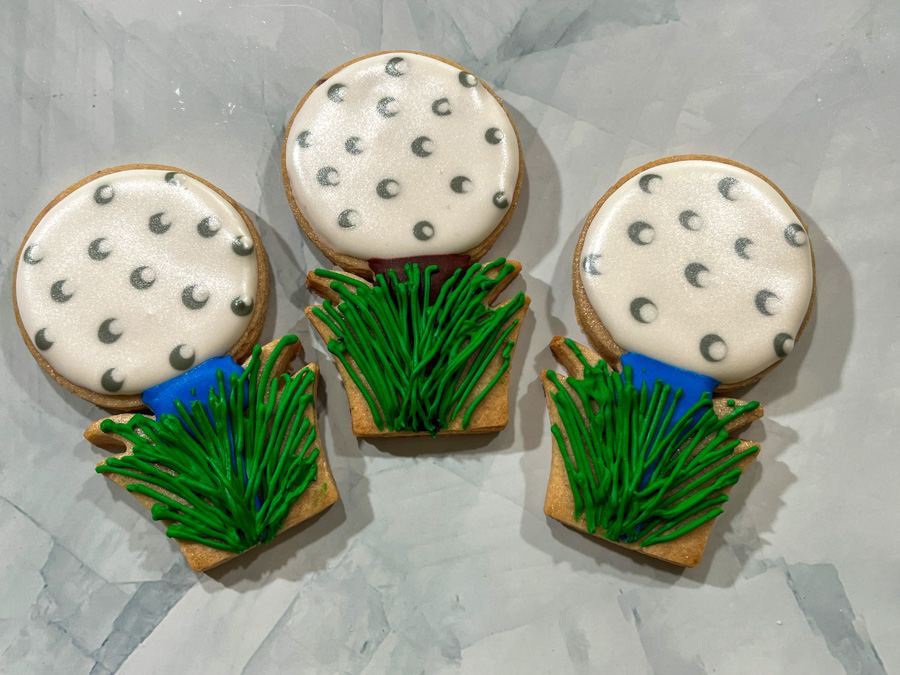
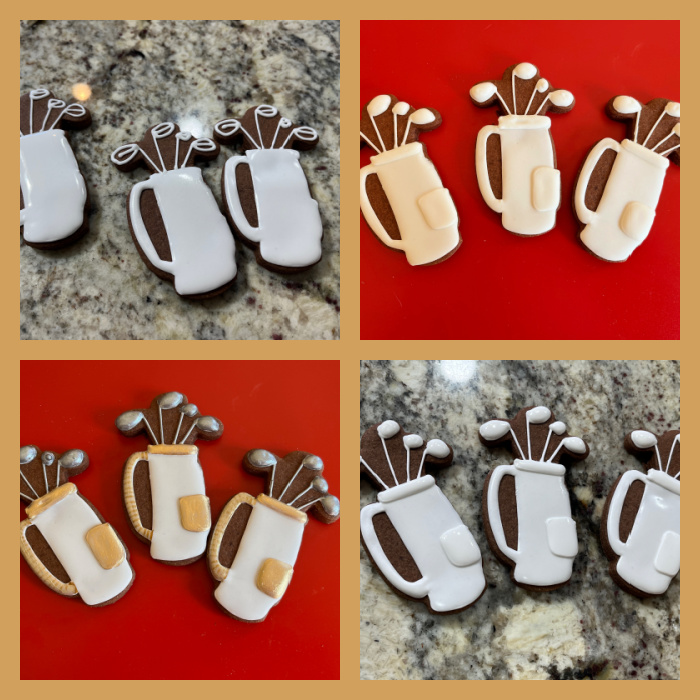
THE GOLF BAG
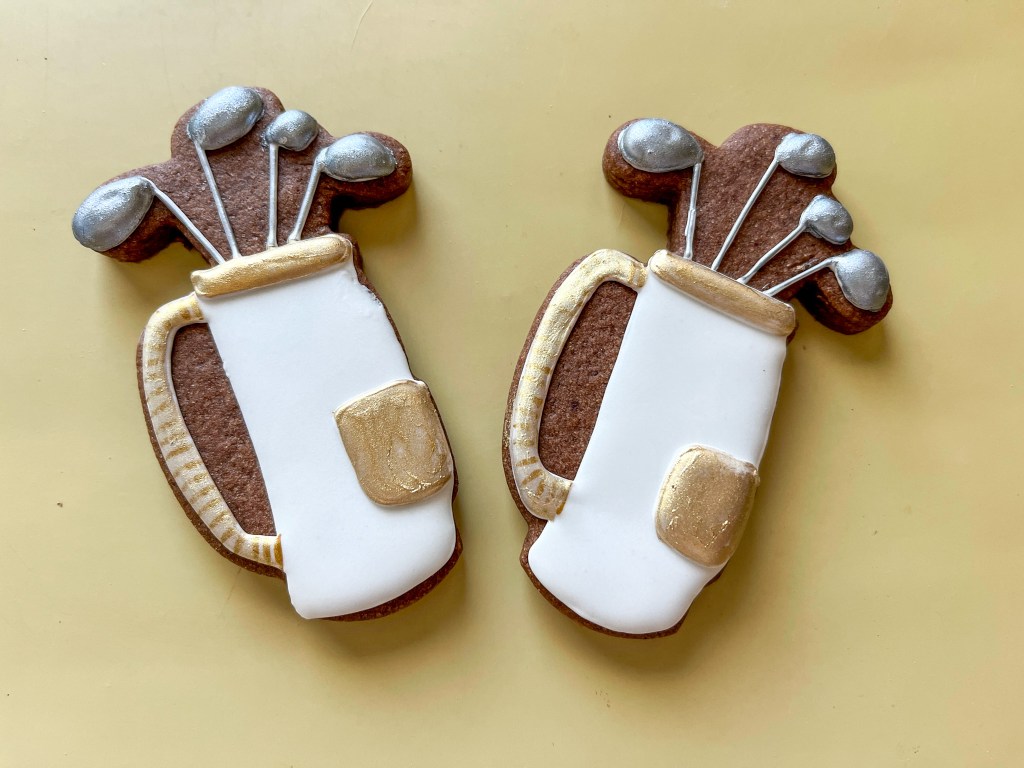
I have used this cookie cutter before (see here), this time I kept it super simple. All flooded with white, then the pocket and the rim of the bag piped in white for details. Once it all dried, I used luster powder gold and silver with vodka to paint. Some steps shown below…
.
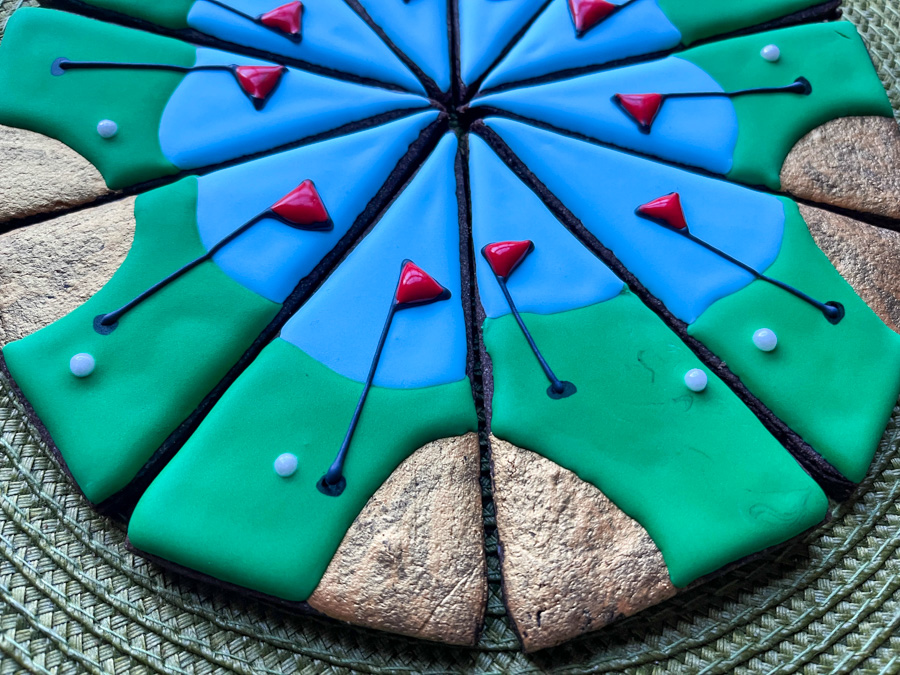
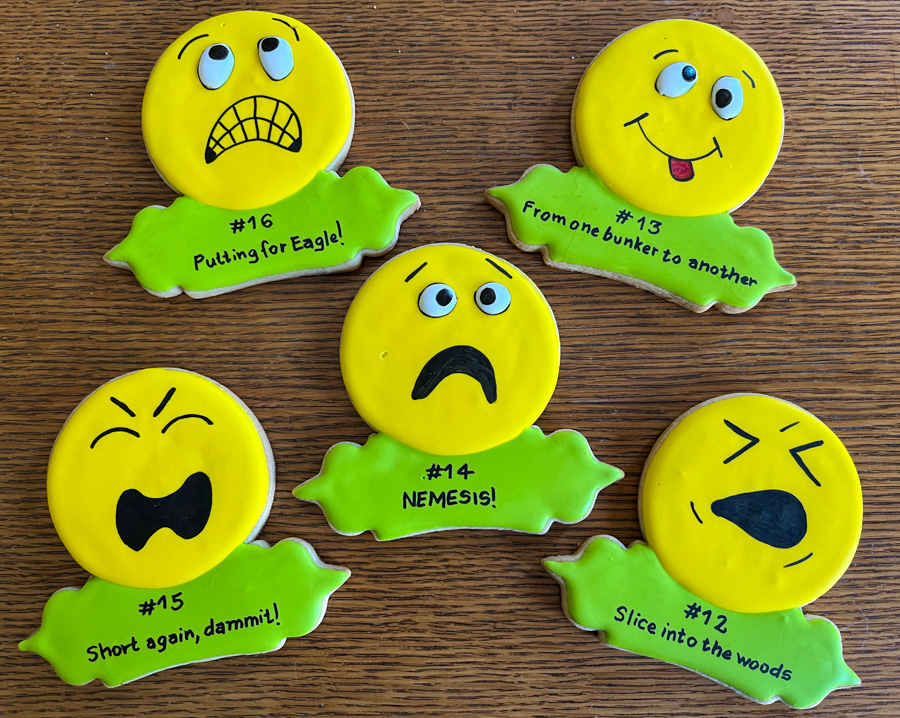
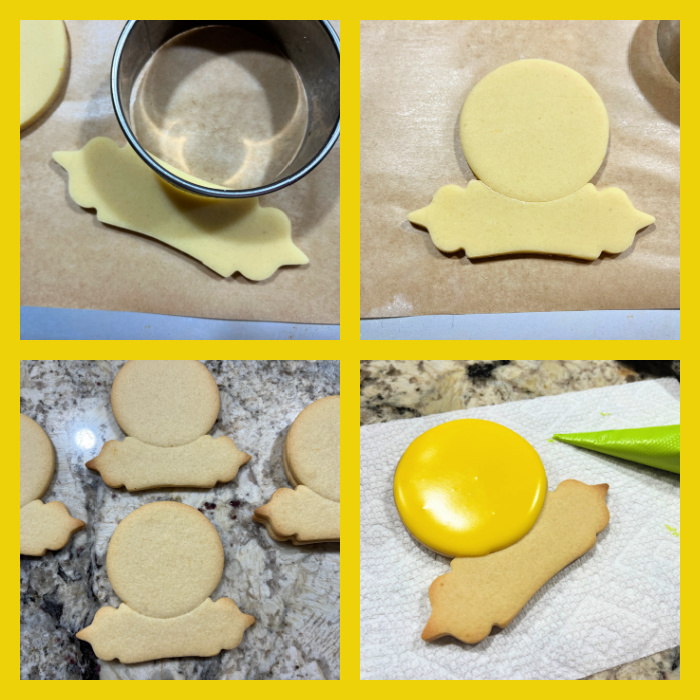
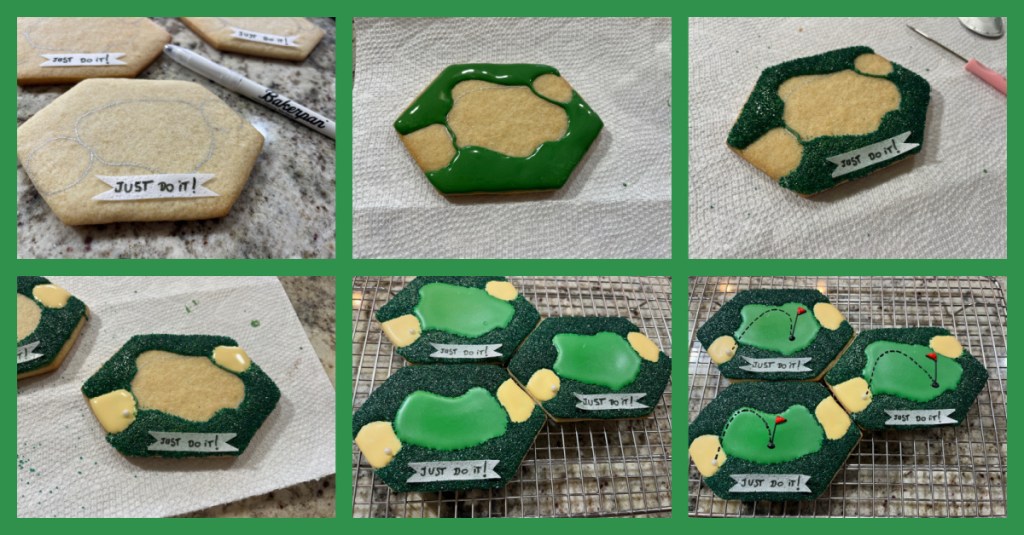
THE PERFECT SHOT
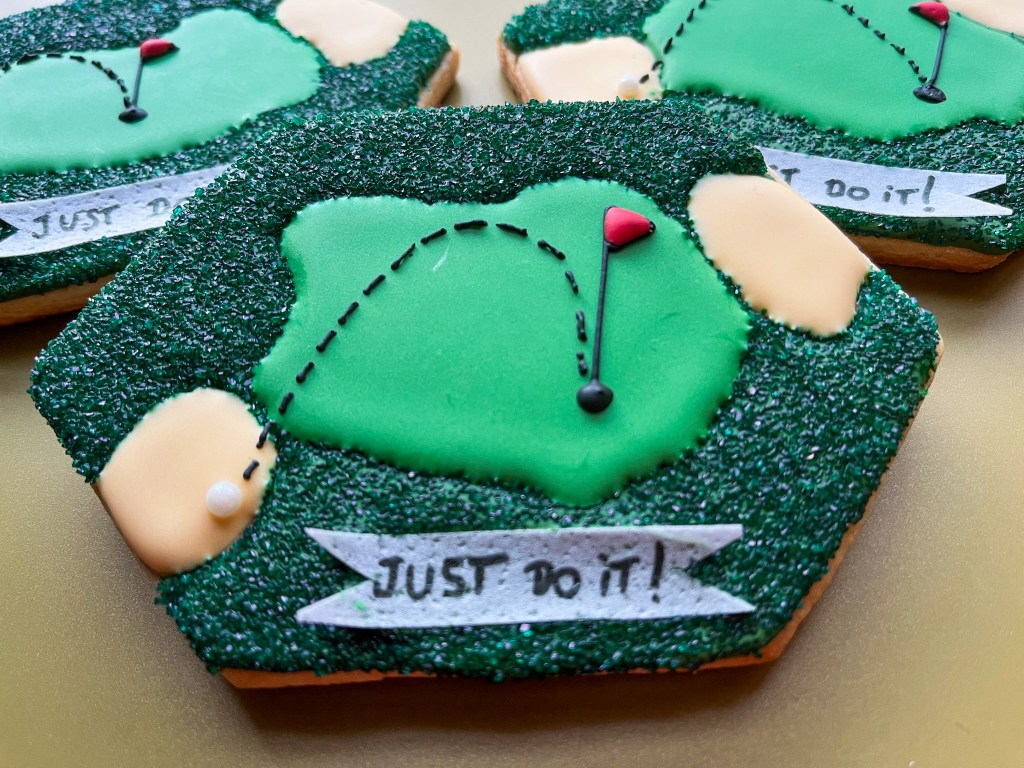
I thought of this design in the middle of the night and could not wait to go work on it next day. I used a very large cookie to accommodate all the features and the little message written on wafer paper and cut to fit the bottom of the cookie. It is a reasonably simple cookie, if you don’t want to pipe fine lines for the path of the ball or the flag stick, you can definitely use a food safe pen. Some of the steps shown below.
I hope you enjoyed this little set. I am always trying to come up with different designs for cookies that my husband can share with his buddies when they finish the first 9 holes. So stay tuned for more, as the golfing season is just starting!

.
For more golf cookie designs from the past, click here
.
ONE YEAR AGO: Playing with Chocolate Royal Icing
TWO YEARS AGO: For the Love of Ukraine