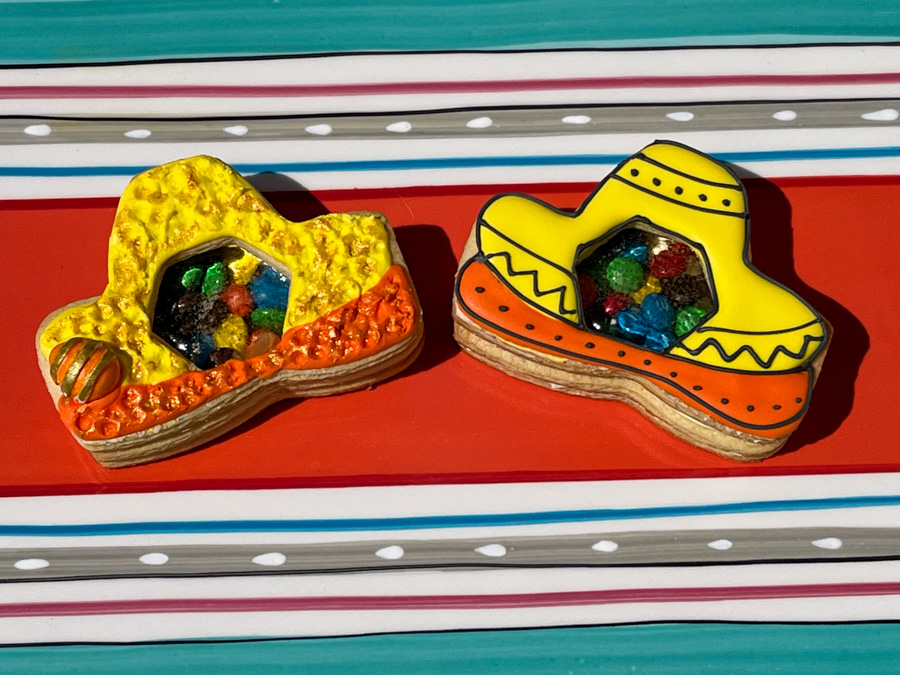
INSPIRATION FOR APRIL: PINATA COOKIES

For this month, Marlyn kept her instructions super simple. Make a piñata cookie. The idea is to enclose goodies inside a cookie, and make them visible through a window. I went with a Mexican theme, and here’s my homework!

.
To make these cookies, decide on a shape, and then bake THREE cookies of that shape. The bottom one will be a solid cookie. The middle and the top will have an opening that you can do using a small cookie cutter. It is best if you refrigerate the rolled out dough so that once you cut the shapes there is no distortion.

As to the transparent window, instead of adding candy during baking, I prefer to make a sugar syrup. The recipe I use can be found in this post. Just make sure you are super careful, it is going to be hot!

Little M&Ms are ideal to fill the opening, as long as you don’t roll your cookies too thin, so that you have enough space to play. If you don’t have a large space, adding sprinkles can be a good, festive option also.

I think piñata cookies are great additions to a cookie gift package, and you can imagine a ton of different shapes as your starting point. I close the post thanking Marlyn for yet another cool challenge!

ONE YEAR AGO: Floral Bunny Ears

TUNDE’S COOKIE BOX ADVENTURE

To join Tunde’s Cookie Club, visit her site with a click here.

Another great online tutorial hosted by Tunde Dugantsi, I would classify it as a more advanced project because some assembly is needed. As you might see from my write-up, the sizing of the panels can make or break the design. I urge you to do all the proper filing and adjusting BEFORE you decorate the panels, and also make sure the base is large enough to accommodate the sides, leaving enough space around it so all the nice piping will show well.

Tunde provided all the templates to cut the cookies by hand, and the base was made with a large cookie cutter, which I happened to have in my basement. She also provided the little templates to pipe the designs: envelope, birds, and cupcakes. Not many colors were needed, pink, red, white, and light brown, all in small amounts, as the cookies are not fully iced. Some colors are needed in piping and flooding consistencies.

Each panel has a different design, which I find absolutely adorable… Then comes the assembly adventure, and that’s when things did not work very well for me. I ended up with a box in which the four corners weren’t meeting together nicely, and it was not possible to do the beautiful piping Tunde planned for the corners and bottom. I also stuck my finger into the envelope, and was quite upset about it. The box, as I first made it, just did not look good. I tried to ice the base after assembly to hide the imperfect junction, and that was the outcome…

I was truly unhappy with it, so I did the only sensible thing to do. Took a deep breath, separated all the pieces, removed the icing from the base, flipped the cookie to use the other side facing up, and painted it gold. These are all the pieces, after filing them, re-adjusting and waiting to be re-assembled.


And that clumsy finger disaster? Was taken care of with a strategic placement of heart sprinkles…. Sneaky Sally strikes again!

So here are the four sides of my little box, once all the cosmetic surgery was done…

I guess the main lesson of this project is to not give up, and if you feel there is a way to improve what you did, go for it. Work around the boo-boos, and that will make you ready for a next time in which you won’t make the same mistakes.

You can adapt the box to any special celebration by using different designs on the side panels, and filling the box with different cookies, or you can just make your life easier and buy candy at the store.

I learned quite a bit through this cute box project, and will definitely make it again, perhaps at Easter…. Stay tuned!

Tunde, thank you once again for coming up with such gorgeous work!

ONE YEAR AGO: Gingerbread Heart Cookies

MARLYN’S INSPIRATION CHALLENGE FOR NOVEMBER

This month, the challenge was summarized in four simple words: “stand up your cookies.” Sounds like something out of a certain tent, right? Not sure if you are watching Great British Bake Off this year, but one technical challenge had an empty page with “make a lemon meringue pie,” Poor contestants…. But, I am not in a tent, no pressure, no cameras, no microphone shoved in my face as things get tricky. Here I am to share the results of my labor, I am quite happy about this composition, and hope you like it too…

For Marlyn’s Facebook page, click here

For Haniela’s Facebook page, click here

The base for the composition is my default chocolate cookie recipe, which you can find in my main food blog with a click here. I constructed a little box, but ended up not using the base, just the sides as it went glued on the base anyway. So here are all the parts baked.

Once the basic components were baked, I started decorating. A couple of weeks ago I took an online class with Haniela where she taught us how to pipe succulents using Royal icing, and I made a bunch during class, and decided to incorporate them in my cookie scene.

The random-shaped base was iced in green with a thicker consistency so I could give it some texture using a brush. The box was also iced with a thicker consistency and the lines added after 15 minutes or so with a needle. Air-brushing gave it a more natural look, so that the color is not too homogeneous. The copper color of the base was just luster powder, applied dry with a soft brush. Acorns are painted fondant, made using a silicone mold.


Squirrels and pumpkins were decorated with Royal icing.


The fun part is definitely assembling it all together… I really enjoyed planning and then making the scene happen. I took the cookie set to our department and I got pretty nice feedback on it. Of all the inspiration posts so far, maybe this is my favorite. Let’s see what Marlyn has in mind for December… Stay tuned!

ONE YEAR AGO: Egg Yolk Painted Cookies

MARLYN’S UNDER THE SEA 3D COMPOSITION

I am totally smitten by this set designed by Marlyn, using several different techniques in cookie decorating. A very detailed tutorial is available for her supporters through Patreon (click here). I cut the background cookie and the fish tail by hand (templates provided by Marlyn) so that they would fit perfectly together, but you can definitely search your cookie cutters and come up with slightly different variations. On a side note, I usually have no idea who gets my cookies, but this set was an exception (read on).

I opted for my default chocolate cookie recipe (you can find it on my food blog clicking here), and used mini cookie cutters from this set from Sugarbelle. The rock at the bottom was made with a flower cutter cut in half. Marlyn used a cloud-shaped cutter.

Here are all the pieces baked and iced, waiting for assembling… Some pieces I made extra just in case something bad happened, and also for practice.

So many techniques: the rock texture made with parchment paper, the fish tail with a small petal tip, and a lot of painting with the air-brush. For the first time I thought I managed to direct the air-brush gun with more precision. For instance the little fish’s mouth, tail and fin were air-brushed in orange without messing up the rest of the body. Yes, there was some hyperventilation associated with the process…

This was really fun to put together, and the icing on the cake is that these cookies were donated for a homeless family of four that has been struggling quite a bit. It made me happy to learn that maybe this little 3D scene could give them a reason to smile.

ONE YEAR AGO: Mr. Seahorse and his friends

HANIELA’S MINI-BIRDHOUSE

This was the second Facebook-live cookie decorating session with the duo Marlyn-Hani (video available here). Last time, Marlyn was in charge of the party, when we made colorful hen cookies (see my post here). In this month’s session, Haniela had us decorate and assemble a super cute birdhouse. Here is mine…

I cannot tell you how much I love this cute house. Because it is small, you don’t need to use construction type gingerbread. A sturdy sugar cookie will do, make sure to bake it until the edges are getting dark, so that is holds better. I used my default recipe as published in my food blog here. These were flavored with honey and orange.

A few things had to be prepared in advance, like the adorable Royal icing transfers butterflies. Hani has a tutorial on youtube with all the details, you can see it here. Some of the steps are shown below.

Also, apart from baking the cookie components (using the templates provided by Hani), the house panels needed to be covered with a very light brushing of gray Royal icing and allowed to fully dry for 24 hours.

With all that ready, during the live event we moved on to decorating the front and back panels… and also the sides with Royal icing transfers for the windows (I did not take a picture of those). I loved the technique to give a wood-like texture. Finally, we piped stems, flowers, and leaves.

The house was then assembled with very thick Royal icing (that brought me horrific memories of my catastrophic performance in front of Paul Hollywood, Sherry Yard, and all my tent-baking friends), but thankfully those demons were exorcized and my bird house stood the challenge. Literally.

The roof is added last, and decorated with medium consistency icing, using two different icing tips, a petal 104 and a closed star. The final touch was adding the butterflies, as if they gently landed on the birdhouse…

All in all, a lovely little project! Of course, you can do many different color schemes to decorate, add different types of flowers, lady bugs, little birds, whatever you feel like it.

Funny tangent: Marlyn was decorating along… when we were perhaps 25 minutes into the live, her house was done. Ready. With all bells and whistles. She used a different style for the panels, to give the house a more woodland appearance, in tones of brown. And different types of flowers. It was gorgeous, and you can see it in the video, available HERE.

Huge thank you to Hani and Marlyn for organizing these events!

GINGERBREAD HEART COOKIES

HAPPY VALENTINE’S DAY!

Today I share something special… my first tridimensional cookie set, following the guidelines of Tunde Dugantsi, from Tunde’s Creations (blog post with recipe and all details here). I’ve had these molds for a while, but lacked the courage to try them. I am so glad I did… I was quite nervous about the whole thing, from rolling the dough, shaping on the mold, and baking, but it all went quite smoothly. I am over the moon with my 3D-gingerbread babies!

Let me walk you through the process of making them…. The composite picture below shows the molds – they come with a set of 12 plus the perfect cutter to the the dough in the right dimension. Tunde shares her optimized recipe for the hearts, a classic gingerbread with plenty of cinnamon, ginger and cloves. To make un-molding easy, the molds are lightly sprayed with oil. I had no issues to bake them, a sharp pointed knife gently inserted on the side helped them release from the mold.

I was worried about the dimensions of the cookies after baking, but for the most part they paired quite nicely.

Once they are baked, the cookies are painted with a mixture of egg yolk, heavy cream, and red food dye.

After the painting dries, the real fun begins… Decorating the cookies with Royal icing. First I sketched a small heart shape in the center, and used that as a guideline for the design, piping with a PME tip 1.5. Once that is fully set, the two cookies can be joined together with Royal icing, adding some goodies inside (I used caramel-filled M&Ms), and a ribbon. A little more Royal icing piped as beads on the opening between the two cookies and the 3D cookie is done!

It was a very nice project that scared me to start with, but once I got the baking out of the way I felt a little more relaxed about it. The decorations made by Tunde are absolutely amazing, her skill with piping designs is unparalleled. I did what I could, simplifying things quite a bit.

The same mold can be used with different types of cookie dough. When you get the molds through Tunde’s etsy shop (click here to order), you will get a leaflet with a couple of interesting recipes in addition to the basic gingerbread. As I mentioned in my last post, love never goes out of fashion, so expect to see more 3D hearts as 2022 flies by…

HAPPY NEW YEAR FROM THE SNOWY VILLAGE!

This set of cookies was fun to make but a little challenging in some ways. You must be attentive to the dimension of the roof components, particularly the thickness of the cookie. Those parts cannot be rolled too thick, they won’t look good and won’t assemble properly. The whole design was conceived and demonstrated by Marlyn (livestream video available in two parts, here and here). I simplified mine a bit, eliminating wafer paper decorations on the edge of the roof. One of my favorite parts of this set was making the rocky path in front of the door. Check out Marlyn’s version to be amazed!

When I first made the cookies, the roof components would not align properly on top of the house, bringing back nightmares of what happened to me in a certain tent. Catastrophic developments that later were broadcast to a few million viewers. Family members and friends included. I quickly donated those roof parts for three very happy pups, and re-made them with more attention to overall dimensions. I used my roller cutter the second time around, and it worked like a charm.

Another component I had to re-make was the snowman. First I used a mini cookie cutter from Sugarbelle, but it ended up too big. The snowman looked like a giant in front of the house. I decided to cut the shape by hand instead.

Each set then takes a base (I used a tumbstone shape), a big triangle for the face of the house, two sticks for the roof, and either a small snowman or a tree to decorate the front. The pebble path is of course optional, but I loved making it.

The roof parts got painted with a light coating of Royal icing, and the front of the house was flooded in red, leaving an opening for the door that was iced with purple. White and green Royal icing in piping consistency were used for all details.

I hate to sound repetitive, but if you want to take your cookie decorating to a higher place, consider joining Marlyn’s site at Patreon. It is one of the best investments you can make, the only “problem” is that she is so productive and shares so many interesting projects that it’s hard to decide what to do next. So stay tuned for more adventures in cookie decorating as 2022 rolls around… Soon this little baby blog of mine will turn 1 year old!