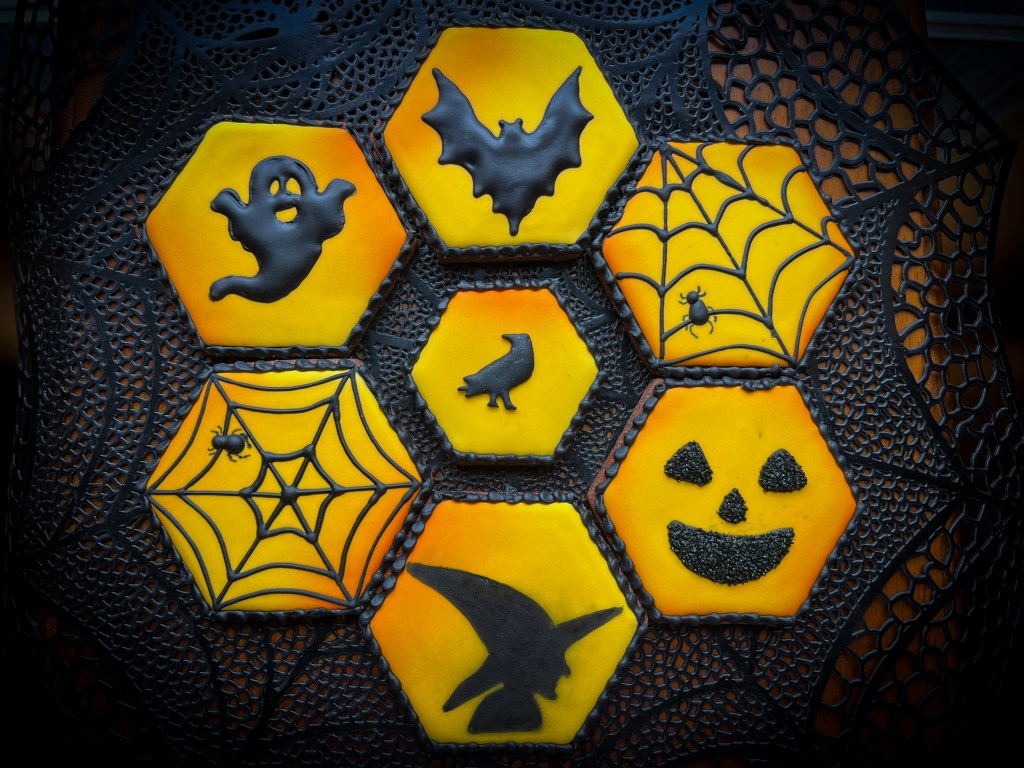
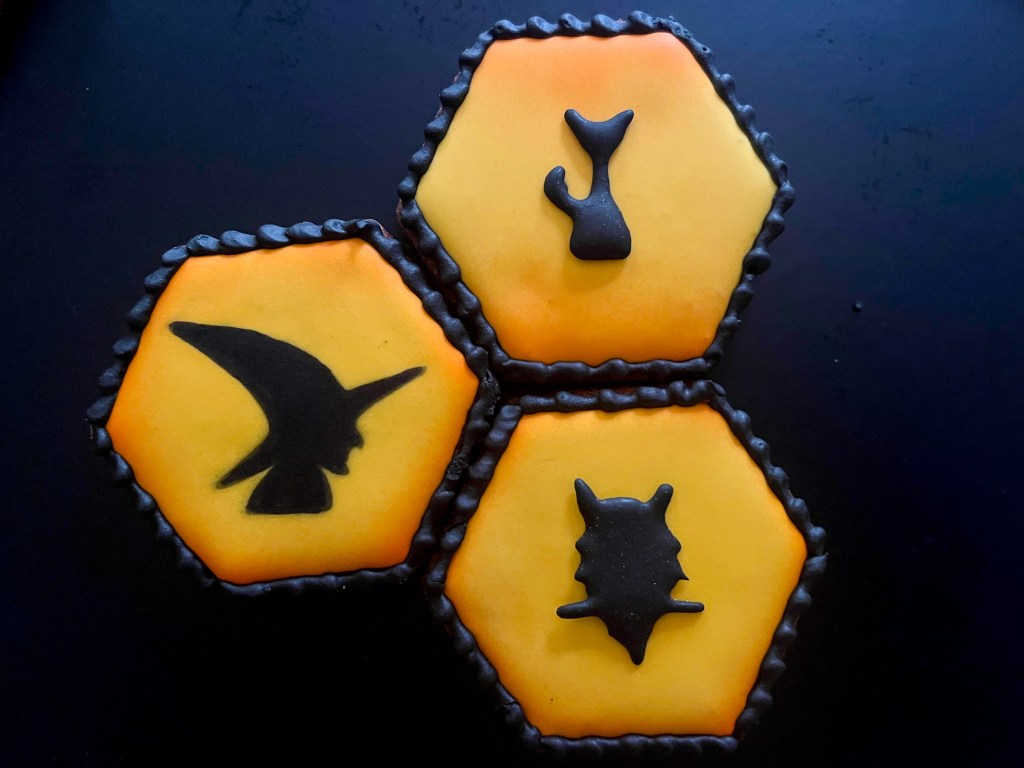
These cookies were made following the most recent tutorial from Tunde Dugantsi (click here to join her club). I love the way they flow together as a group, having in common the two-tone background, and images in black. I took some liberties with the design, using two different sizes of hexagons to accommodate stencils I had available. Six were large, six were small (about 3 inches for the small ones).
.
All cookies were finalized with a black beaded border…

These are some of the steps in the process…
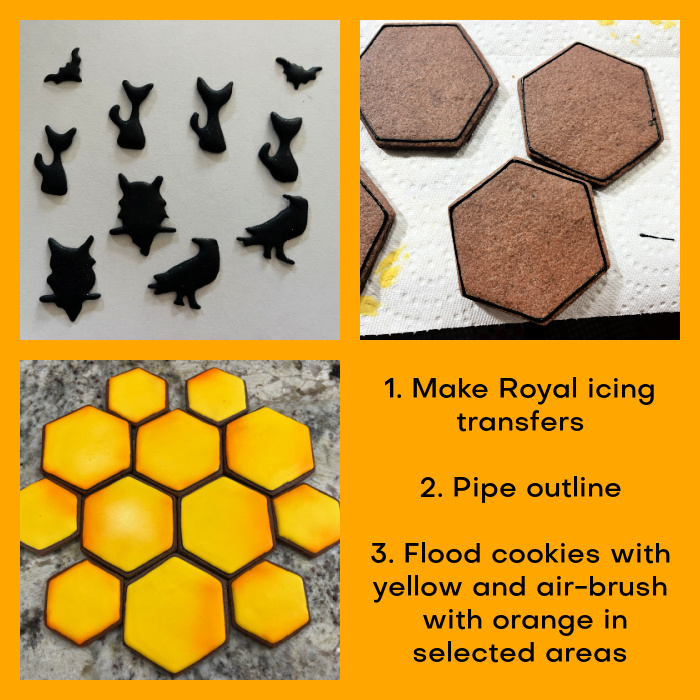
As to the images, you can use different techniques. Tunde provided templates for several different Halloween-inspired images to be piped as Royal icing transfers. I made several the day before so they were fully dry. If you don’t want to go that route, you can opt for air-brushing an image with a stencil, or using a projector to draw a design and pipe black icing over it. Finally, for the spider web all you need is piping consistency icing and a tipless bag. No need for templates, stencils or a projector.
.
My favorite cookie of this series was made with a food projector using an image I found in Pinterest.

I am quite thrilled with this series of cookies, and hope you consider joining Tunde’s club to learn all the cool methods she shares on a regular basis.
.
Until next post, STAY SPOOKY!
ONE YEAR AGO: For the Love of Halloween
TWO YEARS AGO: The Pumpkin Show
THREE YEARS AGO: Cookie Canvas, a Cookbook Review
FOUR YEARS AGO: Marbled Spooky Cookies


Leave a comment