Be afraid, be very afraid…

This is a very large cookie (6 x 4 in), in fact two large cookies glued together. You can buy the set at this store at etsy.com. I also baked a small skull using one of the cavities of this mold, and the chocolate cookie recipe which I blogged about in my main food blog (find it here). The small skull cookie was covered in a thin layer of fondant and dry-dusted with black luster powder. All steps are shown in the picture below, and a little summary will follow.
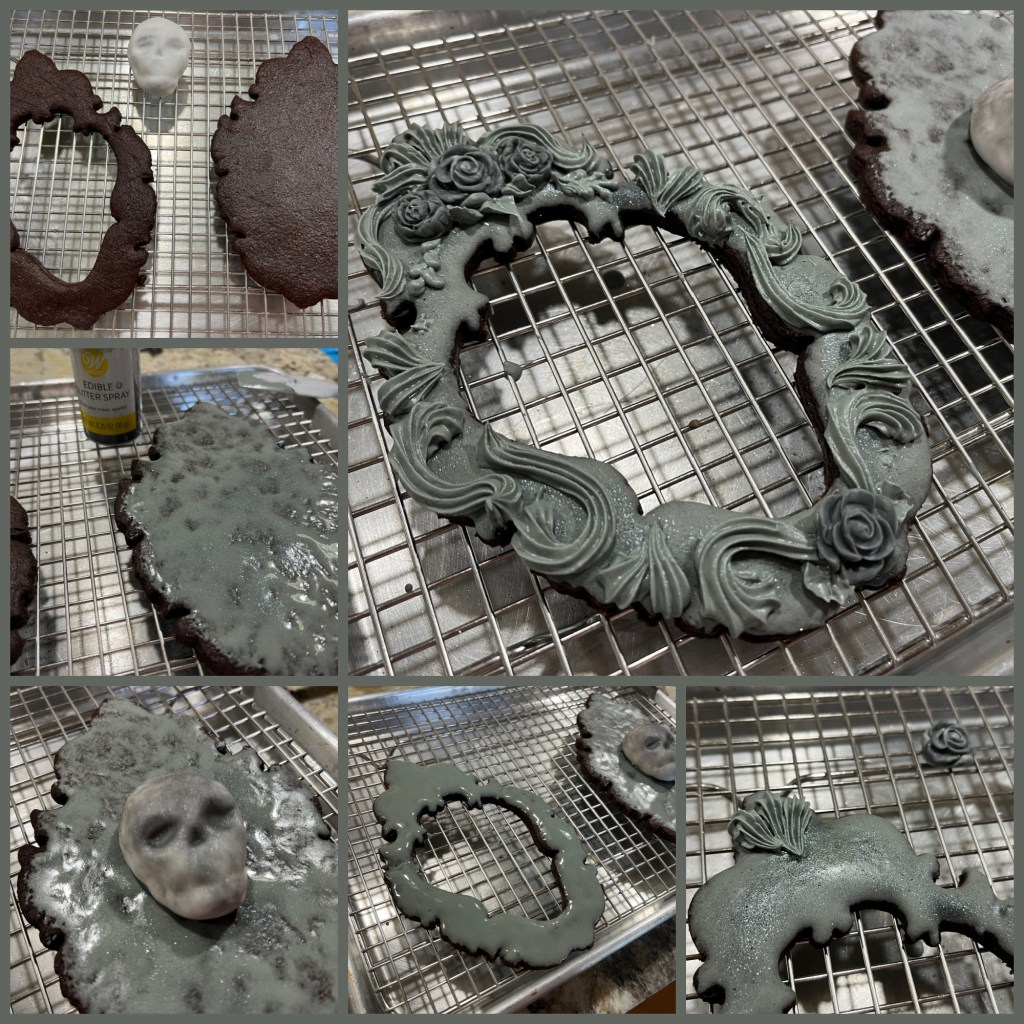
STEPS TO DECORATE THE SPOOKY SKULL
Bake the base, the frame cookie and the small skull
Cover the small skull with a thin layer of white fondant and paint the details with luster powder black or dark brown.
Make a very thin icing dyed gray (I used Gun Metal by Americolor)
Brush the base and the frame with a light coating and immediately spray Wilton Black Edible Glitter)
Glue the small skull to the base with icing.
Make roses of two different sizes using fondant dyed with Gun Metal color.
Make thick icing with the same Gun Metal color and add the decorative swirls to the frame ( I used Wilton star tip #18).
Glue the fondant roses, add more details around it using a leaf tip.
Glue the frame to the base.
Your cookie set is ready and oh so very spooky!

The optional final step is to paint all details of the frame with black luster powder + vodka. That makes the whole design more striking…
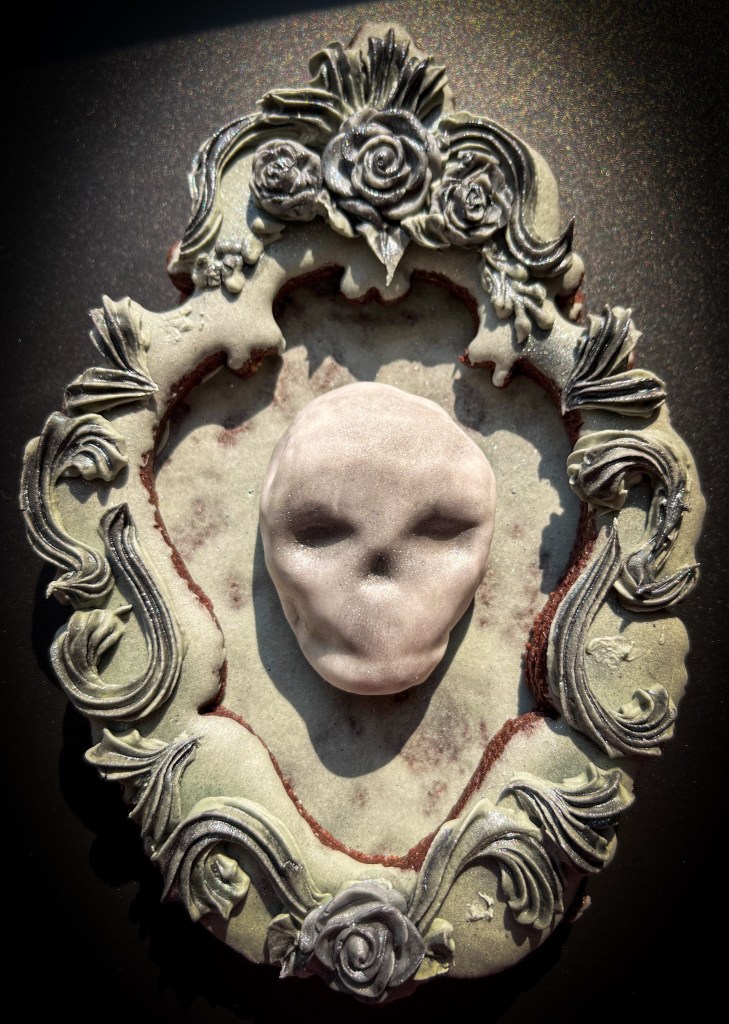
I do hope you got appropriately spooked, as Halloween is just around the corner!
ONE YEAR AGO: Coffee Mugs as Inspiration
TWO YEARS AGO: Little Spider Brooch Cookie
THREE YEARS AGO: Autumn Leaves


Leave a comment