HALOWEEN PIZZA BOX SCENE

STAY CREEPY, MY FRIENDS!

I am thrilled to contribute with my little pizza box concoction to the goodies made by my Great American Baking Show friends. It’s been a while since we got together to bake on a set theme, but better late than never!

I love the concept of pizza box scenes, devised by Marlyn from Montreal Confections, and in fact used one of her ideas for the background cookie. The cookie was made with an impression mat for the wood grain texture. Chocolate sugar cookies are the best for the effect, right before baking you brush a little white food gel to reveal the texture in all its glory. The same cookie was used for the night sky.

COMPONENTS OF THE PIZZA BOX SCENE

A pumpkin-hat combo that I made using two cookie cutters joined together…

A little black cat pressed into the night-sky component, painted with Sugarprism…

A caldron with store-bought spooky eyes and neon-green bubbles…

Fondant decorations for the little ghost (he is friendly!) and bat (he is not rabid)…

Royal icing, piping consistency for the full moon…

This image has an empty alt attribute; its file name is compcald.jpeg

The caldron must be made in stages, so that each group of bubbles has a chance to crust, otherwise they just join together, and the effect will be los

I hope you enjoyed this little pizza box cookie combo. One of the things I like about this version is that some cookies are left plain, so those who prefer less sweetness will appreciate their inclusion. Make sure you use a very flavorful cookie recipe, for the chocolate I recommend this one.

Make sure to stop by the homebakers IG page to see what my tent-baking friends made for this virtual get-together.

LET’S GET SPOOKY!

But let’s do it in style, under the guidance of the great Amy, from Seriously Sweet on Davis St. I could not join her tutorial live, as when that happened I was too concerned with teaching, but a few days later I jumped into it. The great thing about her tutorials is that you can watch them whenever you want in case you cannot join the live session.

I absolutely loved making this series. There were additional cookies demonstrated in the tutorial, but I only managed to make these two. Introducing…

Susie, the Happy Spider!

For the spiderweb cookie, Amy taught us how to give the background a nice texture, and all the details to pipe the web, how to get the dimensions correctly. I made my spider with fondant and dyed it silver. Eyes were tiny little drops of Rainbow Dust Metallic Red.

As to the background it’s all in the consistency of the black Royal icing, as well as the technique to spread it.

SPOOKY TOMB DUET

Aren’t those super cool? Once again Amy taught us how to get the funky background, that can come in handy for many types of cookies.

In the same tutorial she shared a very nice tombstone cookie, and a cauldron. I had made a cauldron the week before, but hers had extra touches of cool, like addition texture to the surface. I will have to re-visit the cauldron issue next year, as spooky baking season is coming to an end. I am not sure how I will deal with Halloween withdrawal syndrome. Am I alone in my misery?

SALLY COOKIES SALLY

I am so so excited about this post! My inability to draw anything free-hand has always bothered me. When I saw that Michelle (the very inventor of Sugarprism in flesh, blood and awesomeness) was going to teach a class online about painting Sally, from the Nightmare before Christmas, I was tempted. Imagine that: creating a very complex image on a cookie without the help of a projector. I admit that my first reaction was to run away screaming. But she convinced me to give it a try, and said she was SURE she could help me. It would be a slow, step-by-step thing, and painless. So one particular Sunday afternoon, I spent two hours surrounded by Sugarprism, brushes, and guess what? There was almost no pain involved. Instead, I was rewarded by a cookie staring at me with a surprised look. Did you really just paint me?

YES I DID!!!!

I cannot tell you how thrilled I was by the time we finished it. I know it pales in comparison to Michelle’s version, and to many made by people in class, but it felt like a masterpiece to me. All credit to Michelle, she just explains every detail so well, how to hold the brush, how much product to add to it, the consistency, and how to approach the design. It was a ton of fun, made me feel on top of the world… And can you believe she did that tutorial FOR FREE? I mean, seriously! Join her Facebook group and come have some fun…

Below a little progression of the cookie painting. I swear, I still cannot believe I painted this. Michelle, have I thanked you enough?

The whole tutorial was to make Phil and Sally, ooops, sorry, I meant Jack and Sally, but I ran out of time and had to leave class. My Jack was not in the best of his shape. Still, it’s Nightmare Before Christmas, I am hoping it just adds to the spirit!

SPOOKTACULAR SHORTBREAD COOKIES

This is a sister-post from yesterday’s publication in my main blog, where you can find the full recipe for these babies. I truly loved their taste and texture and hope you’ll give them a try. In these versions, the spooky quotient was increased with skulls and scary eyes. The shortbread has no leavening agent, so it is a good choice to bake the little skulls, molded in a plastic ice cube tray (available here). Just make sure to keep an eye during baking, as they bake fast. It seems obvious, but let me make sure to reinforce it, you do not bake in the tray, you mold them, release them and bake them free. Maybe there are molds out there made of silicone or metal and you could conceivably do the full baking in them.

As to the scary eyes, those were a ton of fun to make. I followed a very detailed tutorial from Heather Salmon, available in the closed Facebook group “Painting with Sugarprism.” She actually shared two different ways, one with isomalt, which I think is even nicer, but because my cookies are donated and I don’t know who gets them, I was afraid that a young kid could choke on the isomalt. It can be a bit hard. So I opted for fondant. My mold had a little hole for the pupils, so I had to do a bit of patching up with extra fondant to get a fully round surface. Then it was all a matter of painting with Sugarprism, and a final spray with PME pearl luster.

The advantage of all the Halloween decorating things, is that you don’t need to be artistically gifted. It is all good in the end. Imperfections just make it all more real.

The little cat was painted with Baby Black luster powder and the eyes with red. I left the skulls plain, straight from baking, but they could look great with bright red eyes also.

The eyes were placed over black royal icing, thick consistency, piped with a petal tip. After it was fully set, I painted a bit of metallic red from RainbowDust on the edges (available here).

Halloween and cookies are a match made in heaven. Or would it be hell? I have quite a few more designs to share, so stay tuned for more spooky things popping up on your screen…

ARE WE SCARED YET?

MARBLED SPOOKY COOKIES
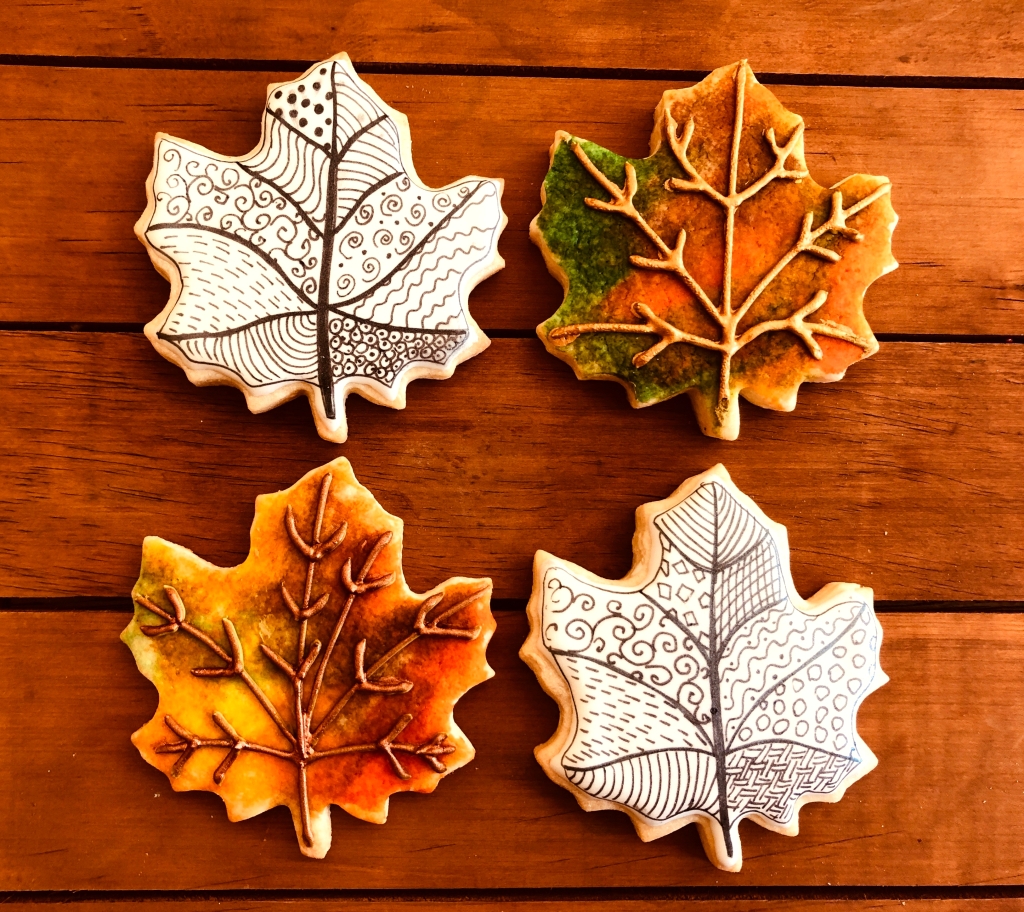
The technique of marbling using dots of gel color on the surface of Royal icing is a nice and straightforward method to generate colorful effects. Recently I saw Marlyn achieve a similar effect by swirling three batches of Royal icing with different colors. She did that on a baking sheet, to get a shallow surface, quite a bit easier to work with the cookies. It all ends up very smooth, with perfect coverage. I picked Halloween-friendly colors and coupled the marbling with spooky fondant decorations or silhouette painting. I ended up feeling pretty spooked. How about you?

This is how Marlyn does the marbling… It is very easy to coat the surface of the cookie when the icing is poured this way, and since the icing needs to be a bit thicker it also covers quite well.

From that point, you can add decorations while the icing is still wet, or wait and glue them later with Royal icing.

For the witch below, I used a stencil and painted the image with a black food pen. The white cookies were just flooded with white icing and painted, free hand with a food pen. That is a simple design, no need to worry about making it perfectly symmetrical or anything.

I tell you one thing, I will be sad when Halloween is over… So. Much. Fun.

AUTUMN LEAVES

In my previous post I shared a slightly unusual take on pumpkins, and now I bring you a black and white alternative for Fall-inspired leaves. The basic idea is very simple, and you can do anything you want for each pattern. Don’t worry about it, don’t be too hard on yourself, it’s not about perfection. If you really hate one particular section you made, go ahead and paint it black… Inspiration came from this Instagram page.

The whole process could not be simpler… just flood the cookies with white Royal icing, and allow it to fully set, overnight is best. Then, divide the leaf in sections using a food-safe black pen, with a fine tip. Create different patterns for each of the sections, pretty much anything you imagine will do.

You can make the cookies big or small, it’s very relaxing to draw the patterns, time flies by…

Leaves are definitely one of the top shapes for cookies during this time of the year. No matter your preference, there is always a style out there for you… I actually like to mix and match, modern and traditional on the same batch.

The same basic idea can be applied to many different shapes of cookies, either decorating the whole area of just a small portion. Colors could be fun too instead of black and white. Once again, as usual with cookies, one simple method and so many things you can do with it!

AND NOW FOR PUMPKIN COMPLETELY DIFFERENT

Dedicated to all Monty Python fans out there.

Count on Marlyn to turn the pumpkin cookie, pretty much mandatory this time of the year, into something unusual and special. If you read my regular food blog, in the last In My Kitchen post I shared a little silicone mold to make a filigree type decoration. It is exactly what I used to decorate the pumpkin cookies, following Marlyn’s design (detailed video available here).

The making of the cookie is actually very simple. For a watercolor effect (starting around 8 min of Marlyn’s video), flood with white and then add patches of color with very diluted gel food dye (Everclear works best to dilute it). Let it dry, and add the fondant decoration, painted with gold luster dust (I used Egyptian gold). Alternatively you can just flood with a solid color like the one on the left side below.

The fall leaves were inspired by Amber, from @sweetambs (watch quick video here). The same watercolor technique, but applied to the naked cookie, so the colors will end up much more vivid. Then the veins are piped and painted with gold or copper. I really love the look of these cookies, and they both are pretty simple to decorate, plus the fall leaves will please those who prefer a cookie without too much Royal icing.

Visit my recent https://bewitchingkitchen.com/2021/10/01/in-my-kitchen-october-2021/In My Kitchen post to see the silicone mold I used for the decoration. There are plenty of options available in stores like amazon, etsy or aliexpress, make sure you consider the size of your pumpkin cookie cutter to get the appropriate mold.

A little play with coral colors in different techniques: air-brush with stencil, textured icing (laying crumpled parchment paper on the wet icing and waiting 24 hours to remove it), and the watercolor pumpkin.

I am a lover of all things Summer, but I have to admit that the Fall with all the warm colors and interesting shapes is one of the best seasons for cookie baking and decorating. Stay tuned for a lot more…

COOKIE LACE DESIGN: FACING MY FEARS

I’ve said it before, and I will say it again: I am not wild about piping fine lines with Royal icing. They scare me to death. But truth is, they can make a cookie very special and festive, so I’ve been forcing myself to try them every chance I get. Lace design – aka Needlepoint – requires that you pipe quite a few of those fine lines side by side. It is time-consuming and I won’t lie, a bit stressful. But I am so glad I gave it a try!

It all starts by piping a grid that will hold your pattern, so you must decide on how many rows of little squares you’ll need. I decided to keep my first designs simple and just do a central ribbon of needlepoint.

Small deviations on the angle of a piped line risk being propagated on subsequent lines and the final design will show it. You might notice that the right side of my ribbon ended up slightly bigger. But I am still pretty happy with it, as I never imagined being able to do it.

I was a little more attentive (and lucky) on the blue cookie below, so the outcome was better…

I wanted to have a little shine on the lace, so I sprayed Diamond Dust right after piping, protecting the rest of the cookie with this super complex baking trick:

You can also do the needlepoint in a special shape… Just pipe the outline and then carefully add the rows. It is best to start at the center of the heart and move up and down from there. The pink cookies had been flooded in white icing and painted pink once fully set. The blue one was flooded with Sugarflair Royal Blue.

It is amazing what some cookie artists can do with lacework, one of the very best is Tunde Dugantsi, from Tunde’s Creations. She has a Facebook group where you can get plenty of advice and troubleshooting, and her book “Cookie Academy – Lace Design” is a great source to get started. Very detailed instructions, templates to practice, and so many ideas! I highly recommend it. Mind-blowing stuff. I am just taking small, timid footsteps in that path, and hoping to get less stressed out about it. It is all in the consistency of the Royal icing. The finer the lines, the more you’ll need to hit the consistency JUST right. Even if you might not be interested in the more intricate piping of needlepoint, fine lines have their place in simpler designs, like the guitar below.

Lace Design goes well with Etching, I think. Royal Blue from Sugarflair is superb for those…

And even when the lines are not super fine, you can make interesting patterns. I confess I had no idea where I was going with the one below, but I ended up liking it a lot…

If you’d like to try it, practicing on parchment paper helps a lot to make sure the consistency is right. I know many people like tipless bags for this technique, but I could not make it work, I used a number 1 PME tip. Next time I will go for the 00. Because the worst that can happen is…. being forced to eat the evidence!

A FAIRY COTTAGE COOKIE COMPOSITION

If you are serious about cookie decorating, I am sure you follow Amber, from @sweetambs. A while ago she posted a very special tutorial (exclusive to Patreon supporters) to make a Fairy Cottage cookie composition. A real masterpiece with quite a few steps. The thing that fascinated me the most was the pebble work on the surface of the house. You pipe each pebble individually as a Royal icing transfer, and then glue them to the cookie right after brushing some thick icing as a base. Each pebble is also painted with luster powder and vodka in black and brown, to make the final product even more realistic. I wanted to turn that into a pizza box concoction, so I reduced the dimensions of the house to fit inside the 7 x 7 inch box, and simplified the details a bit.

The two large cookies for the house were cut by hand, and I did the same for the small mushrooms, as I did not have any cookie cutter that would be compatible with the final dimension of the composition. Just make sure to keep an eye during baking because the small cookies will bake a lot faster.

The prep steps start with piping the pebbles with gray icing and letting them dry overnight. Paint them while still glued to the paper. Ice the walls and chimney, glue the pebbles. The hard work is done! The window panels were simple white icing painted later in yellow. The door was made with slightly thicker icing, to get some texture with a brush. Amber’s video is very detailed and you will have no issues following it. My favorite part was perhaps the roof, made with brush embroidery. Since the method allows the background to show, it is a nice touch to paint it brown with luster powder before proceeding with the embroidery step. Amber does a lot more to her fairy cottage in terms of details under the windows, and around the house, so make sure to check it out and be amazed. Here is the short version of her video, as posted on IG.

I hope you liked my Little Cottage, I am quite smitten with the pizza box format, which I find perfect to offer as a gift. That reminds me… I need to place another order at amazon for those boxes, because how could I risk running out of them?